
1-2-2 Zone Defense: Coaching Guide
The 1-2-2 zone pressures the ball, clogs the paint, and forces offenses into the corners — where your traps are waiting. This guide covers the setup, rotations, cutter rules, and drills you need to install it.
Formation and Personnel
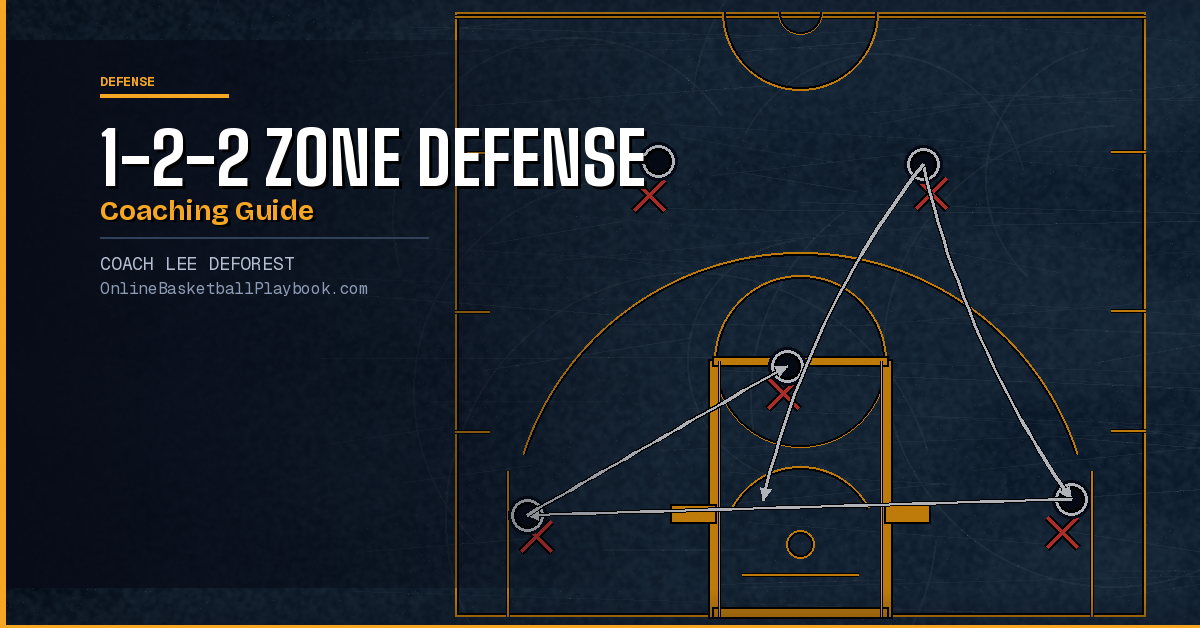
The 1-2-2 zone lines up one defender at the top of the key, two defenders at the mid-post elbows, and two defenders at the low-block area along the baseline. At a glance it looks like a packed paint defense, but the real purpose is dictating where the ball goes and then trapping those spots with coordinated pressure.
Personnel decisions matter before you ever draw this up on a whiteboard. Your top defender — the "1" — needs to be your best on-ball pressure player. He is the engine. His positioning determines every alignment adjustment behind him. Coaches running the Flip Saunders matchup version of this defense call him the "boss": the point defender defines the starting position for all four others. When he moves, everyone shifts. A slow or passive top defender breaks the entire structure before a single pass is thrown.
Your two wing defenders (the "2" layer) should be long and active. Their job is to cut off skip passes and cover the high-post area when the ball is near the top. They cannot be stationary — this defense requires constant anticipation and movement. A wing who simply stands at the elbow gets beaten over the top by cutters and skip passes to the corner.
The two baseline defenders need to be your best communicators. They cover a wide area — from the low block across the baseline to the corners — and they must talk constantly. They call out screens, signal when they are trapping, and warn their wing partners when a cutter is coming through the lane. Teams that are quiet on defense run the 1-2-2 poorly almost without exception.
"The point defender (the '1') defines the starting position for all four others. Everyone else matches off his alignment. If the boss moves, the whole zone shifts."
— Matchup Zone Coaching Principles
One practical note on setup: many coaches use the 1-2-2 as an extended press look, with the top defender picking up ball-handlers near half-court and the wings positioned higher than the three-point line. This forces early decisions from the offense and can create turnovers before the offense even sets up. Whether you play it up or back depends on your personnel and what the opponent does with early-offense actions.
Ball-Side Rotations
Ball-side rotations are the backbone of the 1-2-2. When the ball moves, the zone must move with it — quickly and in unison. The rotation rule is simple to state but hard to execute under game speed: defenders always rotate to the ball side, and the weakside defenders compress toward the paint.
When the ball is at the top of the key, the top defender applies direct pressure. The two wings sit at the elbows ready to cut off passes to the high post or the wing. The two baseline defenders pinch toward the paint, making any lob pass or baseline drive extremely difficult.
When the ball swings to the wing, the near wing defender moves out to contest. The top defender drops toward the ball side to discourage reversal and help trap. The ball-side baseline defender steps up toward the short corner, ready to either trap or cover the corner. Meanwhile, the weakside wing and baseline defender both collapse toward the paint — this is the key rotation that keeps the middle closed.
Corner traps are the signature weapon of the 1-2-2. When the ball reaches the corner, the baseline defender and the wing defender pinch simultaneously to trap. The top defender rotates down to cover the mid-range area and deny a pass back to the wing. The weakside baseline defender steps up to the paint to deter the skip pass to the opposite block. The weakside wing is responsible for any skip to the opposite wing or the top. These five assignments must happen at the same time — a single defender who is late blows up the trap and gives the offense an easy skip to an open shooter.
Run five specific passes — top → wing → corner → skip → opposite wing → top — and have all five defenders rotate to the correct spot after each pass before the passer releases the next one. Do it at half-speed first, then at game speed. The goal is that every defender can describe where they go on each pass without thinking about it.
One common rotation mistake: baseline defenders who get "ball-chased" — they follow the ball all the way to the opposite corner on a skip pass and leave the strong-side block wide open. Baseline defenders need to understand that on a skip, they rotate to the paint first, then follow the ball only after the opposite baseline defender has covered the corner.
Cutter and Flash Rules
The 1-2-2's biggest vulnerability on paper is the high-post flash and the baseline cut. If a team figures out they can dump the ball to a big flashing to the mid-post, they will destroy this defense. Your cutter rules have to be specific and practiced.
On any flash to the high post, the near wing defender is responsible for meeting the cutter at the three-point line — not at the elbow, not at the free-throw line. The further out you meet the flash, the less time the offense has to operate from a dangerous spot. If the wing defender waits until the cutter is at the elbow, he has already given up the best scoring location in the half-court.
On baseline cuts, the baseline defender on that side is responsible for the cutter until the cutter crosses the paint. At that point — when the cutter enters the lane — the opposite baseline defender picks him up. This handoff must be verbal: the picking defender calls "I got him" and the releasing defender lets go. Zones that do not verbalize this hand-off end up with two defenders chasing one cutter and the opposite corner wide open.
When the offense runs a player off a screen near the baseline, things get more complicated. Many coaches solve this by using a "switch everything below the block" rule: any screen set below the block triggers an automatic switch between the two baseline defenders. No call, no hesitation. Both defenders know to switch, and neither has to make a read under game-speed pressure. This removes a decision point at the most chaotic moment on the floor.
High-ball-screen actions near the top of the key test the top defender. In a straight area zone this is manageable — the defender just slides under the screen. But if you are running any matchup principles within your 1-2-2, you need a clear rule: hedge and recover, go under, or hard hedge and have the near wing rotate to the roller. Pick one rule and rep it. Inconsistency here kills the defense faster than any offense scheme will.
Matchup Zone Principles
Many coaches run a pure area 1-2-2 where defenders cover spots and rotate on ball movement. A growing number are blending man principles into the zone — sometimes called a matchup zone or a hybrid zone. Understanding the difference helps you decide which version fits your roster and your opponent.
In a pure area 1-2-2, defenders are responsible for a section of the floor. If no one is in your area, you are reading and helping. Offenses beat pure area zones by putting people in the gaps — having a shooter stand in the seam between two defenders where technically neither defender is assigned to him. Good offenses find these gaps quickly and get open looks from them.
In a matchup 1-2-2, you close those gaps by adding a rule: the moment an offensive player enters your area, you match up to him like man-to-man. You play him with man pressure until he leaves your area, then you hand him to the next defender. This eliminates the "no man's land" that kills area zones, and it is far harder to scout because it looks different every time depending on where the offense puts its players.
The tradeoff is complexity. Matchup principles require more practice time, more communication, and players who can switch between zone and man instincts within the same possession. If you have two weeks to install a defense, teach the pure area version first. If you have a full preseason and experienced defenders, the matchup layer is worth adding because it dramatically reduces easy gap-shots.
The switching protocol in a matchup zone also simplifies cutter defense. Instead of tracking a cutter through the lane and making a read about whether to stay with him or hand off, you apply a pre-assigned rule: cutters are always handed off when they cross into the next defender's area. There is no read under pressure. Defenders can prepare for the handoff mentally before it happens, which speeds up every cutter rotation.
Defending the Weaknesses
Every zone has structural weaknesses, and the 1-2-2 is no exception. Knowing where your defense is vulnerable lets you build specific rules to shore those spots up — and lets you understand when an opponent is attacking your scheme intelligently.
The most consistent attack against the 1-2-2 is a patient overload: put three players on one side of the floor, force the zone to account for all three, and kick the ball to the open man on the weak side. Against an overload, the weakside wing must be willing to guard all the way to the opposite corner on a skip pass. If he is not athletic enough to do this, you either need to sub in someone who is, or you need to modify the weak-side coverage to account for it.
The second common attack is the skip pass to the corner combined with an immediate interior pass. The corner receives the skip, and the moment a baseline defender closes out, the corner player dumps it inside to a cutter. Your baseline defender must be coached not to fully commit on the corner closeout — he closes hard but keeps his inside foot in the paint, protecting against the dump inside. This is a difficult technique to teach because it feels like you are not fully guarding the corner player. The answer is rep count: make your defenders close out to the corner in a 3-on-3 drill hundreds of times until the technique is automatic.
The third weakness is the high-post entry. When an offense can get the ball to a skilled mid-post player, the 1-2-2 is in trouble because both baseline defenders have to respect their low-post assignments, and the wing defenders are too high to help quickly. The solution is aggression at the three-point line — meet all high-post flashes early and deny the catch whenever possible. If the catch happens anyway, the two baseline defenders immediately pinch the ball-handler in the high post while the top defender recovers to take away the first pass out.
Understanding these weaknesses as a coach lets you have honest conversations with your team: "Yes, they will try this. Here is exactly what we do when they do." That preparation eliminates panic rotations and keeps five players thinking clearly instead of reacting blindly.
Practice Drills to Install It Fast
Installing a zone defense quickly comes down to two things: making the alignments automatic and building rotation speed through repetition. The drills below build both, and they can be run in thirty minutes of practice time with no live offense.
The first drill is called "Phantom Ball." The coach walks across the three-point line holding a ball and all five defenders move without any passes being thrown. The coach moves left — the zone slides left. He dips to the corner — the trap closes. He lifts the ball overhead — the defense calls "shot" and crashes the glass. Five minutes of this at the start of practice beats twenty minutes of live five-on-five for teaching alignment because there is no distracting offense and you can stop and correct every mistake immediately.
The second drill is "Three-Pass Trap." The offense makes only three passes — wing, corner, skip — and the defense must complete the full rotation for each. Run it with the offense passive first (no shooting), then add shooting on the third pass. The goal is that on the corner pass, the trap closes in under two seconds every time. Time it. Put a number on it. Players respond to specific targets.
The third drill is "Cutter Wars." Put two offensive players inside the paint and have them cut randomly in all directions. Three defensive players (the two baseline defenders and one wing) must hand off every cutter verbally and never lose track of either offensive player. Do this for ninety seconds, then rotate. It is exhausting and it is exactly what happens in games when offenses try to confuse the zone with movement.
Run these three drills consistently for two weeks and your players will understand the zone's logic — not just the footwork, but why each rotation exists. That understanding is what separates a zone defense that holds up in the fourth quarter from one that falls apart the first time an opponent runs something the team has not seen.
- Top defender is the boss — his position sets the entire zone's alignment; use your best on-ball pressure player here
- Corner trap = 2-second rule — baseline + wing must close simultaneously; any delay gives up the skip
- Baseline defenders pinch the paint first — never ball-chase across the lane on a skip pass
- Verbalize every cutter handoff — "I got him" before releasing; silence means double coverage or no coverage
- Meet high-post flashes at the three-point line — not at the elbow; give the offense less operating space
- Switch everything below the block — removes decision-making at the most chaotic spot on the floor
Want more defensive schemes, rotation breakdowns, and printable playbook pages delivered free?
See it drawn up
Related diagrams


Keep Building
Related breakdowns