
Basketball Tryout Drills
Most tryouts waste time on scrimmages that hide bad habits. The right drills expose decision-making, finishing, and coachability in 90 minutes — giving you real data to build your roster on.
What Tryout Drills Actually Measure
Every drill in a tryout is a data collection tool. The question is whether you know what data you are collecting. A poorly designed tryout gathers information about who is already the most skilled — that is easy to spot without a structured session. A well-designed tryout gathers information about how players think, how they respond to pressure, whether they finish when they are tired, and whether they can adjust when a coach stops them and explains something new.
There are four categories of information worth collecting at a basketball tryout:
- Finishing skill: Can the player convert at the rim under contact and with either hand?
- Shot quality: Does the player take good shots from game spots at game speed, or do they manufacture looks?
- Decision-making: What does the player do when the defense takes away their first option?
- Motor and coachability: Does the player compete at full effort, and do they apply a correction the first time?
The drills below are organized around those four categories. Each drill reveals something a scrimmage obscures. Run them in this order and you will walk out of the gym with a ranking you can defend.
The Problem With Scrimmage-First Tryouts
When coaches run scrimmages at the start of a tryout, the players who are already confident take over. Role players and less experienced athletes disappear into the background. You end up selecting personalities, not basketball players. Breakdown drills put everyone in the same situation and give you a consistent baseline for comparison.
The other problem with scrimmage-first tryouts is that they reward ball-dominant behavior. Players who pass up good looks to handle the ball more look skilled in a scrimmage but fall apart in a system. Drills that enforce a decision — pass or drive, cut or set — reveal who can play within structure.
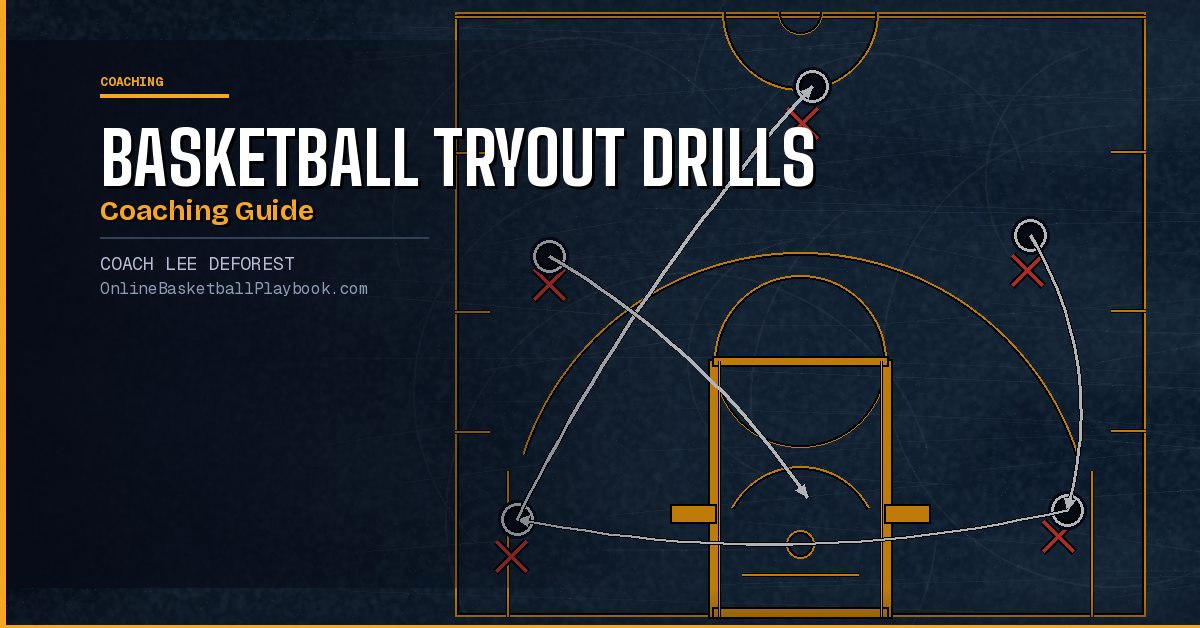
Finishing and Layup Drills
Finishing at the rim is the most under-evaluated skill at youth and high school tryouts. Coaches spend five minutes on layup lines — which is essentially a shooting warmup, not an evaluation — and then move on. That is a mistake. A player who cannot finish with the non-dominant hand, cannot finish through light contact, and does not know how to use the backboard is going to limit your offense every time they get to the rim.
X-Layups
Set up two lines — one on each block. Players alternate crossing to the opposite side and finishing. Right side: left-hand reverse layup off the glass. Left side: right-hand reverse layup off the glass. The crossing pattern creates game-realistic angles and forces the non-dominant hand on every other rep.
What to watch: Does the player understand the geometry of the drill, or do they panic when the angle is wrong? Do they use the backboard, or do they try to lay the ball in flat and miss short? Lazy finishers use one hand regardless of which side they are on. That is a flag.
Full-Court Speed Layups
The target from the vault's full-court drill bank: make 50 layups in 2 minutes. Two lines at one end, one ball, constant outlet-and-go. Players who can hit this number at pace without the finish breaking down are conditioned and technically sound. Players who get tired and start dropping their elbow or jumping off the wrong foot under fatigue are showing you exactly what will happen in the fourth quarter of a close game.
Score it publicly. Post the number on the wall after the drill. Competitive pressure during a tryout drill is itself data — watch who rises and who wilts.
Chase Drill
One player drives baseline from the wing. A second player, starting at the opposite elbow, sprints to contest the layup. The finisher must convert through the contest — or they run. This is the simplest tryout finishing drill you can run, and it reveals three things instantly: finishing under pressure, willingness to attack contested, and whether the contester competes on defense at full effort.
Competitive Shooting Drills
The standard tryout shooting drill puts players in a line and has them shoot from a few spots. Every player gets the same warm look, from the same angle, with a passer who sets them up perfectly. That is not a game shot. Game shots come off movement, off a screen, under time pressure, and from spots the defense has left open rather than spots the player chose.
Five-Spot Shooting
Five spots on the arc: both corners, both wings, and the top. Players rotate through all five spots continuously, shooting off a pass. Set a target — 7 out of 10 from each spot, or a combined makes count in 90 seconds. Track makes, not attempts. Players who drift off spots, catch flat-footed, or short-hop their feet on the catch are revealing footwork habits that will not improve without intentional work. The vault principle is clear: "game shots at game spots at game speed — form precedes speed, footwork precedes the ball."
Olympic Shooting
Two-ball competitive shooting. Two players work simultaneously from the same spot, each with their own rebounder/passer. First player to a set number of makes wins. Losers rotate. This is the highest-volume shooting drill you can run in a tryout window, and the competition reveals who competes on every shot versus who drifts in and out mentally. Watch for "lock and load" ready position — the player whose hands are up and weight is forward before the ball arrives is telling you something about their basketball IQ.
Celtic Shooting
A player must make two shots in a row from a spot before they can advance to the next spot. Miss, and they restart the streak. This drill is brutal for players with mechanical inconsistency in their release. It also reveals mental toughness: players who get stuck on spot two for thirty seconds and stay composed versus players who start forcing shots to get through.
Decision-Making Small-Sided Games
Small-sided games are the best tryout tool available — and the most underused. They are small enough that every player is involved on every possession, but they enforce decisions that reveal IQ. A 2-on-2 drill with one read built in tells you more about a player's basketball instincts than a full scrimmage where they can hide behind four teammates.
Texas 2-on-2 (Step Off)
Ball starts on the wing. The ball-handler has one live dribble. Their partner cuts from the opposite corner or elbow. Defense is live. The ball-handler must read the cut and make a decision: drive if the defender sags, pass to the cutter if the defender denies the drive. One decision, one rep, rotate. Run this drill at tryouts and you will separate players who play within reads from players who only know how to create off the bounce.
1-on-1 with a Constraint
Standard 1-on-1 starting from the wing, 15 to 20 feet from the basket. Add one constraint: mid-range pull-up shots count as turnovers. The only scores are at the rim or from behind the arc. This constraint, drawn directly from the Blood series used in Memphis-style breakdown drill work, forces players to make a definitive decision rather than taking the comfortable bail-out. Comfortable players in 1-on-1 without constraints will pull up from 17 feet every time. You will never see what they can actually do.
2-on-1 Post Double Pass-Out (Drew Hanlen)
One post player catches on the block. A double-team arrives immediately from the weak side. The post player must make the pass-out decision before the double collapses — drive baseline if the double is late, kick to the skip man if the double cuts off the baseline. Winner stays. This drill works as a tryout drill for any position because everyone rotates through the passing roles. You are looking for who can read pressure and make the correct decision at speed, not who can post up the hardest.
Each drill enforces a single decision or skill, not the whole offense — use constraints like mid-range equals a turnover and dribble limits to coach decisions without lecturing or stopping the competitive flow of the drill.
— Offensive Breakdown Drills, Basketball Vault
Transition and Conditioning Drills
Conditioning during a tryout is non-negotiable. Not because you need players to be exhausted, but because fatigue is the only honest truth serum in basketball. Players who are tired cannot fake their habits. Their footwork breaks first, then their decision-making, and then their motor. The transition drills below reveal all three.
11-Man Continuous 3-on-2
The classic continuous break drill. Eleven players, two lines at one end, one line in the middle. The three attackers run the break against two defenders. After the possession ends, two of the attackers stay back as the new defense. The rebounder outlets and fills a lane. This drill runs continuously for 3 to 5 minutes. The player who is still sprinting their lane, still talking on defense, and still making the right read in the eighth trip is your highest-effort player. That player is building your program's culture whether or not they have the most skill in the gym.
Duke 21 (Score-and-Recover)
Player scores in transition, then immediately sprints back to touch half-court before transitioning to defense against the next wave. The sprint-back is mandatory. The scoring player must defend the next break at a disadvantage because they are scrambling back from half-court. This drill builds conditioning, but more relevantly for a tryout, it reveals which players accept the defensive assignment after scoring and which players jog back. The jogging ones are telling you something about their defensive character.
6-Trips Layup Series
Full-court layup sequence: player makes a right-hand layup, sprints to the other end for a left-hand layup, sprints back for a right-hand reverse, sprints for a left-hand reverse, then two more trips for bank shots off each side. Six trips total. The player who completes six trips with correct finishing footwork on all six — not just when they are fresh — is a different level of athlete than the player who gets through six trips but loses their form by trip four.
Run the transition and conditioning drills in the final third of your tryout, not at the start. Players who know they are being evaluated at the end of a physically demanding session will show you their true motor. Front-loading conditioning rewards players who conserve energy early, which is the opposite of what you want to see from your most important roster spots. Save the sprint-back and continuous break drills for when everyone is already tired.
How to Structure Your Tryout Sequence
Tryout structure matters as much as drill selection. A tryout without a sequence is just organized chaos — players move from station to station without a build, and coaches have no framework for comparing what they saw in the first drill to what they saw in the last drill.
Here is a 90-minute tryout sequence built around the drills above:
Minutes 1–15: Dynamic warmup and X-Layups. Start every player at the same place. X-Layups are a warmup drill and an evaluation drill simultaneously. You are watching footwork, hand selection, and effort before anyone knows the real evaluation has begun.
Minutes 16–35: Competitive shooting. Rotate through Five-Spot and Olympic Shooting. Two coaches stationed at opposite ends, each tracking makes and noting who is ready before the catch. This is the highest-volume evaluation window of the tryout.
Minutes 36–60: Small-sided decision games. Texas 2-on-2, 1-on-1 with constraints, and a Post Pass-Out round for your bigs. Coaches take notes by player number, not name. Evaluate the read, not the result — a correct decision that results in a missed shot is still a correct decision.
Minutes 61–85: Transition and conditioning. 11-Man Continuous 3-on-2, followed by Duke 21 for your guards and wings. Coaches are now tracking effort and decision-making under fatigue. Players who are still locked in at minute 80 of a physical tryout are your roster cornerstones.
Minutes 86–90: Controlled scrimmage, Popovich-style. One point for scoring, one point for a stop — even a three-pointer earns just one point. Play to 10. After going down and back twice, throw to the coach and restart. This format, used by Popovich to structure practice scrimmages, prevents ripping and running out of control. Coaches can re-teach after each possession pair. The tryout ends with your staff seeing players in live defense before a decision is made.
Evaluating Players Across Drills
Use a consistent scoring sheet for every player. Track four categories on a 1–5 scale: finishing, shot quality, decision-making, and motor. Score each category independently after each drill, not at the end of the tryout from memory. End-of-tryout memory is dominated by what happened last — which is exactly why you save the conditioning drills for the end. A player who graded a 4 on finishing and a 4 on motor is more valuable to most programs than a player who graded a 5 on shot quality and a 2 on motor, even if the second player looked flashier in the scrimmage.
At the end of the tryout, average the four category scores and rank your players. Compare your numeric ranking to your gut ranking. When they diverge, read the drill notes — the drills are usually right and the gut is usually responding to confidence and size, not to basketball skill.
- X-Layups: Watch hand selection on the wrong-side finish — players who always use their dominant hand regardless of angle will struggle in your half-court offense.
- Five-Spot Shooting: Look for catch-ready hands and forward weight before the pass arrives — flat-footed catchers rarely become consistent shooters at the next level.
- Texas 2-on-2: Score the read, not the result — a player who drives correctly and misses the layup made the right basketball decision; credit it.
- 1-on-1 with Constraints: The mid-range = turnover rule removes the bail-out; any player who still drifts to 17 feet repeatedly is showing you a deeply ingrained habit that will need months to change.
- 11-Man Continuous: Watch lane-filling in transition — a player who sprints wide and fills the third lane properly understands pace-and-space even if no one taught them to call it that.
- Duke 21: A player who jogs the sprint-back after scoring is showing you their defensive character — do not build your roster on players who compete selectively.
- Controlled Scrimmage: Note who communicates on defense between possessions — the vocal leaders in a structured setting are the ones who will hold teammates accountable in practice.
Want more basketball coaching strategies, drills, and tools?
See it drawn up
Related diagrams


Keep Building
Related breakdowns
Transition Offense Basketball Plays for Quick Scores
Transition Offense Basketball Plays for Quick Scores