
How to Do a Euro Step in Basketball
The Euro step is a two-step gather move that lets a ball-handler sidestep a shot-blocker or help defender on the way to the rim. Learn the footwork, the timing, and how to drill it correctly.
What the Euro Step Is
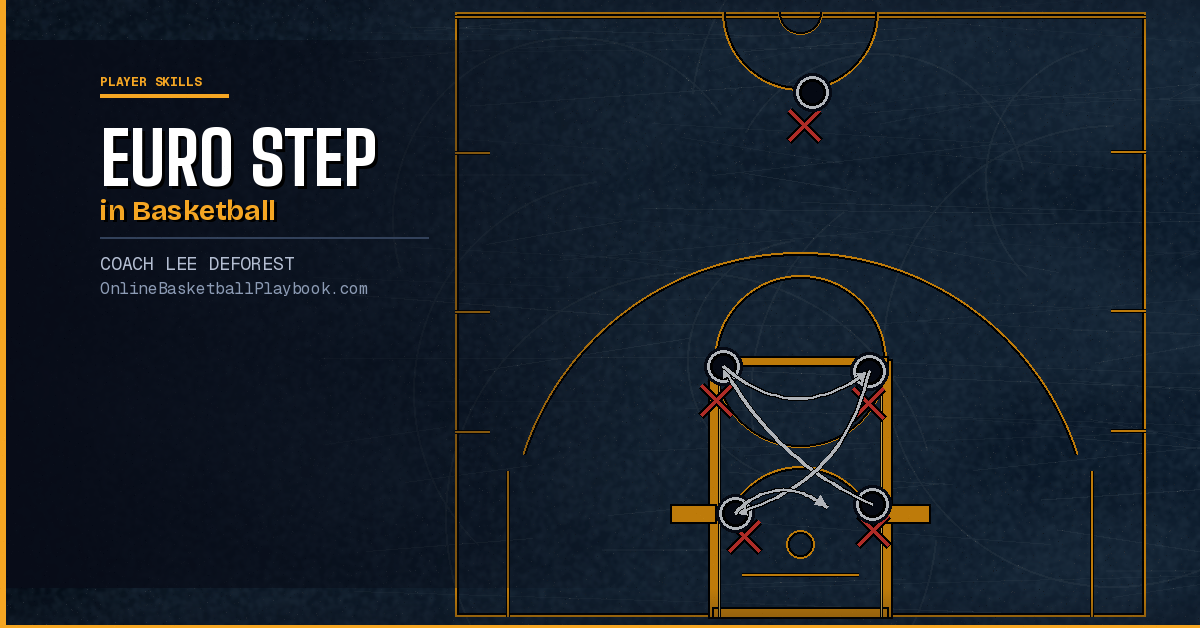
The Euro step — sometimes called the "two-step" or the "Ginobili step" after Manu Ginobili, who popularized it in the NBA — is a legal gather move that uses the two allowed steps after a player stops dribbling. Instead of taking both steps in a straight line toward the basket, the ball-handler takes the first step in one direction and the second step in the opposite direction, sliding around a defender who has committed to the first step.
The move is not a travel. NBA and FIBA rules allow two steps after the gather. The Euro step uses those same two steps — it just uses them with lateral displacement rather than straight-line momentum. Referees who are unfamiliar with the rule will occasionally call it, but at every level from high school to the pros, the move is within the rules when executed correctly.
What separates the Euro step from a simple layup is the deception built into the footwork. The first step sells a drive in one direction. When the defender shifts weight to cut off that path, the second step goes the opposite way. The ball stays protected close to the body the entire time, and the finish comes off the correct foot with the rim between the ball and the shot-blocker.
Step-by-Step Footwork Breakdown
Breaking down the Euro step into its components makes teaching it straightforward. Here is the full sequence:
The Gather
The move begins with the final dribble. As the ball comes up into the hand, the ball-handler plants the gather foot — the foot that touches the ground as they pick up the ball. This is a critical moment. The gather must happen while the ball-handler is still in motion; if they stop completely before picking up the dribble, the move loses all of its deception.
Keep the ball low and close to the hip at the gather. A high gather gives defenders time to read what is coming. A low, tight gather protects the ball and keeps the defender guessing.
Step One — The Fake Direction
The first step after the gather goes in the primary fake direction. If you are driving right and the help defender is positioned slightly left of center, your first step goes left — toward the defender, getting their weight moving. The step should be decisive and long enough to credibly threaten that path. A short, tentative step does not sell the fake.
At the moment this step lands, the ball stays on the same side as the step — protected away from the defender's hands. Shoulders stay square to the basket. Eyes stay up.
Step Two — The Real Direction
As soon as the first foot hits the floor, the second step explodes in the opposite direction. This is where the move lives. The second step must be quick and long — covering ground away from the defender who has just committed. The second foot lands, the knee bends to absorb contact and generate upward momentum, and the ball comes up to the finish.
The finish is typically a soft layup off the backboard or a short floater. The specific finish depends on where the help defender is: if they have fully committed and are out of the play, lay it straight in; if there is still a shot-blocker closing, throw a floater off the glass using the rim as a shield.
Ball Protection Throughout
The ball never crosses in front of the body during a Euro step. It moves with the body, staying on the hip of whichever side is away from the defender. A common beginner error is swinging the ball through the air to change hands — that gives a long defender an easy strip opportunity. Carry the ball tight; let the feet do the work.
When to Use It on the Court
The Euro step works best in specific defensive situations. Understanding those situations is what separates a player who can execute the move from a player who knows when to use it.
Help Defense Commitments Early
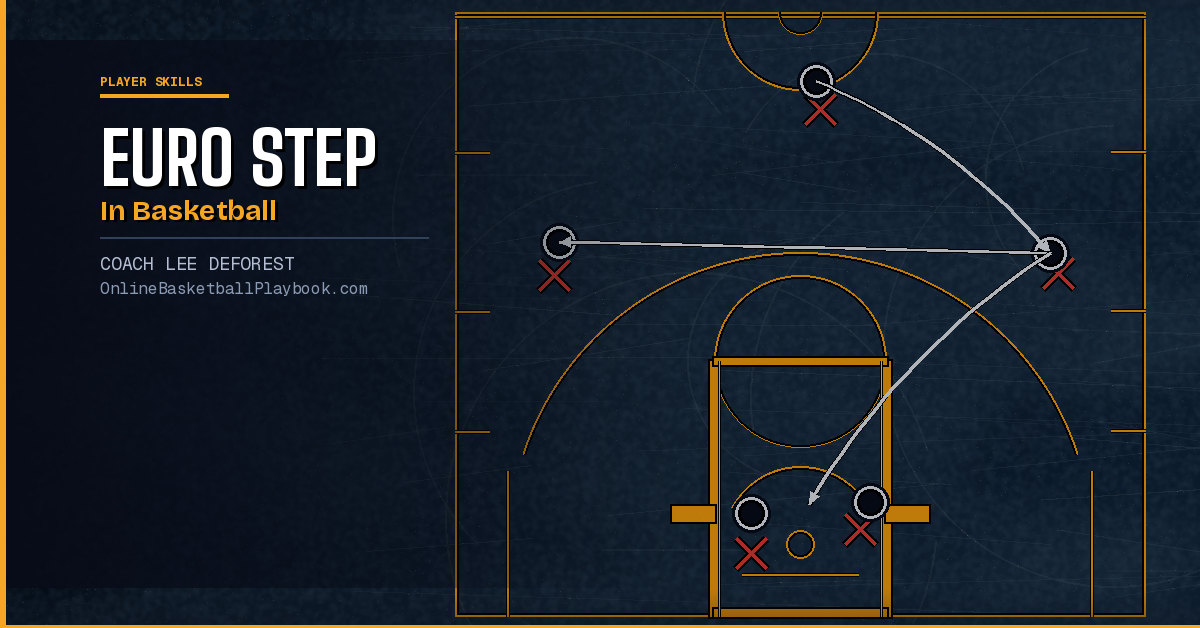
The Euro step is at its best when a help defender must commit before you gather the ball. A flat pick-and-roll, a middle drive that forces early rotation from the weak-side — these create the conditions where a help defender has to pick a side before knowing where you will finish. The Euro step exploits that early commitment.
One Step Ahead of the Rim Protector
Against a shot-blocker who waits and times the ball, a straight-line drive ends in a block. The Euro step changes the angle of approach at the last moment. The rim protector who was in perfect position to reject a straight-line layup now has to re-rotate their hips, and that re-rotation is slow enough that the ball is already off the glass.
Late-Clock Situations
In late-game situations where defenders are gambling, the Euro step is a reliable way to draw a foul. The first step sells hard enough that an aggressive defender will lunge, and the second step carries the ball-handler past contact. Finishing through that contact — chin down, arm extended — earns trips to the line.
When Not to Use It
The Euro step is the wrong choice when the lane is crowded with multiple defenders in tight positions. It requires enough lateral space to make the second step meaningful. Against a properly loaded paint with two or three defenders in close proximity, a simple jump stop and a kick-out to a shooter is a better read. Know the move; also know when to take what the defense gives you.
Common Mistakes and How to Fix Them
Players learning the Euro step tend to make the same errors. Here are the most common ones and the corrections to apply.
Traveling — Steps in the Wrong Order
The most frequent mistake is gathering the ball too late — effectively taking three steps. This happens when a player picks up the dribble and then takes a hop step before the two legal steps. Teach the gather: the ball comes into both hands at the moment the foot hits the floor, not after. Use slow-motion walkthroughs at practice speed before adding any game speed.
First Step Too Short
A short first step gives the defender no reason to commit. Without commitment from the defender, the second step has no one to go around. Demand that the first step covers real ground — it should be a genuine, explosive step that threatens the path convincingly. If the player is timid on the first step, the whole move collapses.
Ball Swinging Wide
Carrying the ball wide on the lateral shift gives shot-blockers and perimeter defenders a chance to knock it free. Keep the ball pressed to the hip and close to the body as the second step fires. The ball should never be held out at arm's length during the transition between steps.
Losing Balance at the Finish
Players who rush the second step often arrive at the finish off-balance, with their weight falling sideways rather than moving upward. The second step should bend the knee and load the leg, converting lateral momentum into vertical lift. A weak, rushed second step produces a floating, off-balance attempt that misses short or gets blocked from behind.
Wrong Finishing Hand
The finish should come off the hand closest to the basket — typically the hand on the side of the second step. Using the outside hand reaches across the body and exposes the ball to weakside help. Train the finish hand specifically: right second step, right-hand finish; left second step, left-hand finish.
Drills to Build the Move
The Euro step requires repetition at game speed before it becomes reliable under pressure. These drills build the move from its components.
Cone Euro Step Drill
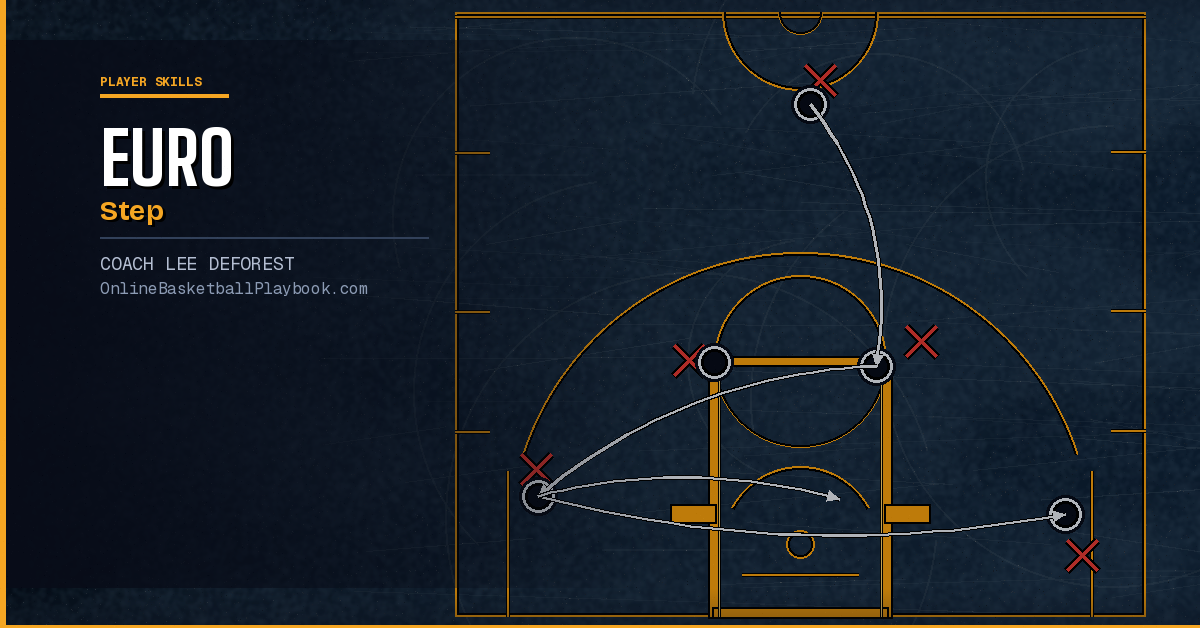
Place a cone or a chair at the free-throw line extended. The player starts at half court with a ball, attacks the cone at game speed, plants the gather foot at the cone, and executes the Euro step. Alternate the direction of the second step — right one rep, left the next. Run 10 reps per side before adding any defense. This builds the footwork pattern without cognitive overload.
Two-Cone Sequence
Add a second cone three feet to the side of the first. The player aims the first step at cone one, the second step at cone two. The physical targets make the lateral displacement concrete and measurable. This version helps players who are taking a first step that is not long or directional enough — the cone gives them something to aim at.
Live 1-on-1 from the Wing
Once the footwork is clean in isolation, add a defender. The defender starts at the dotted circle near the basket, no help available. The offensive player drives from the wing. The defender's job is to take away the straight-line path and force a gather, which sets up the Euro step naturally. Do not let the offensive player just go around the defender without the gather — require a true two-step finish. This rep teaches the move in context.
Jump-Stop Layup Progression
Before adding the lateral displacement, build the jump-stop layup as a base. The vault notes from FCP coaching practice emphasize using jump-stop-only layups at the start of the year to force players to deal with help defense before floating through it. The same principle applies here: master gathering on a jump stop, then graduate to the lateral two-step once the gather is automatic.
Train a finish menu — regular, opposite-hand, power, reverse, floater, and Euro step — and choose by where the help is. Use the rim as a shield; finish through contact.
— Finishing & Footwork concept, Basketball Vault
Drill the Euro step with your weakest finishers first. Players who already have a reliable straight-line layup will revert to it under pressure; players who need another option in their finish menu will commit to learning the footwork correctly because they need it the most.
Fitting the Euro Step Into Your Finish Menu
The Basketball Vault coaching framework treats finishing at the rim as a menu, not a single move. The vault lists regular layup, opposite-hand layup, power layup, reverse layup, floater/runner, and Euro step as the core family — and the right finish is selected based on where the help is, not based on habit or preference.
That framing matters for how you teach the Euro step to your players. The move should not be the default — it should be the answer to a specific defensive read: a help defender who has committed to one side. Players who use the Euro step as their only finish will be predictable; defenders will stop committing on the first step and the move loses its effect. Players who have a full finish menu — and choose the Euro step when the defense earns it — are genuinely difficult to guard at the rim.
Introduce the Euro step after players have a reliable straight-line layup and a basic power finish. It does not make sense as a first teaching priority, but once the foundation is there, it adds a dimension that helps against the shot-blockers and early-rotating help defenders that straight-line finishers struggle against.
The floater and the Euro step are complementary. A player who can Euro step will beat the defender who commits; the floater beats the defender who does not commit but is tall enough to contest from the straight-line path. Teaching them together gives a guard or wing a complete answer to any rim protection scheme.
- Gather foot timing: ball hits both hands exactly as the gather foot lands — not after a hop, not before the foot is down. Walk it through slowly until it is automatic.
- First step must threaten: long, decisive, and aimed directly at the space you are faking into — a timid first step gives the defender nothing to react to and kills the deception.
- Ball stays on the hip: do not swing the ball through the air between steps; carry it tight to the body on the side away from the nearest defender's hands throughout both steps.
- Second step loads, does not just land: bend the knee on the second step to convert lateral momentum into upward lift — a straight-legged second step produces a flat, off-balance finish that misses or gets blocked from behind.
- Finish hand matches the second step: second step to the right means the right hand finishes; second step to the left means the left hand finishes — crossing the body exposes the ball to weakside help.
Want more basketball coaching strategies and drills?
See it drawn up
Related diagrams


Keep Building
Related breakdowns
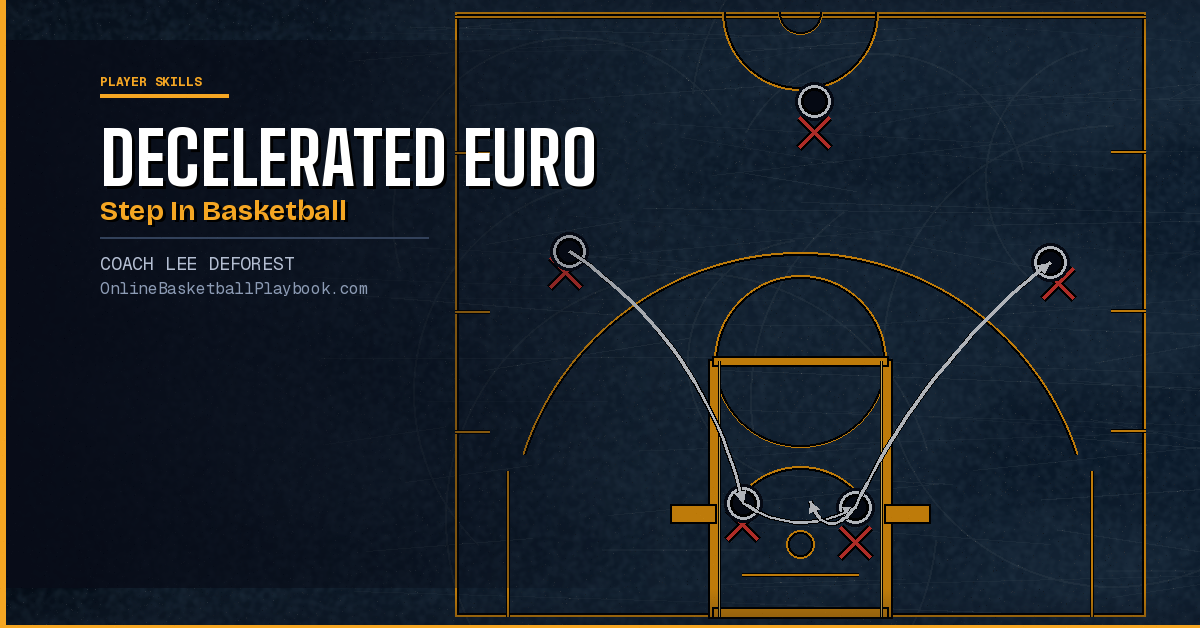
How to Do a Decelerated Euro Step in Basketball
How to Do a Decelerated Euro Step in Basketball