
Hedge in Basketball Ball Screen Defense
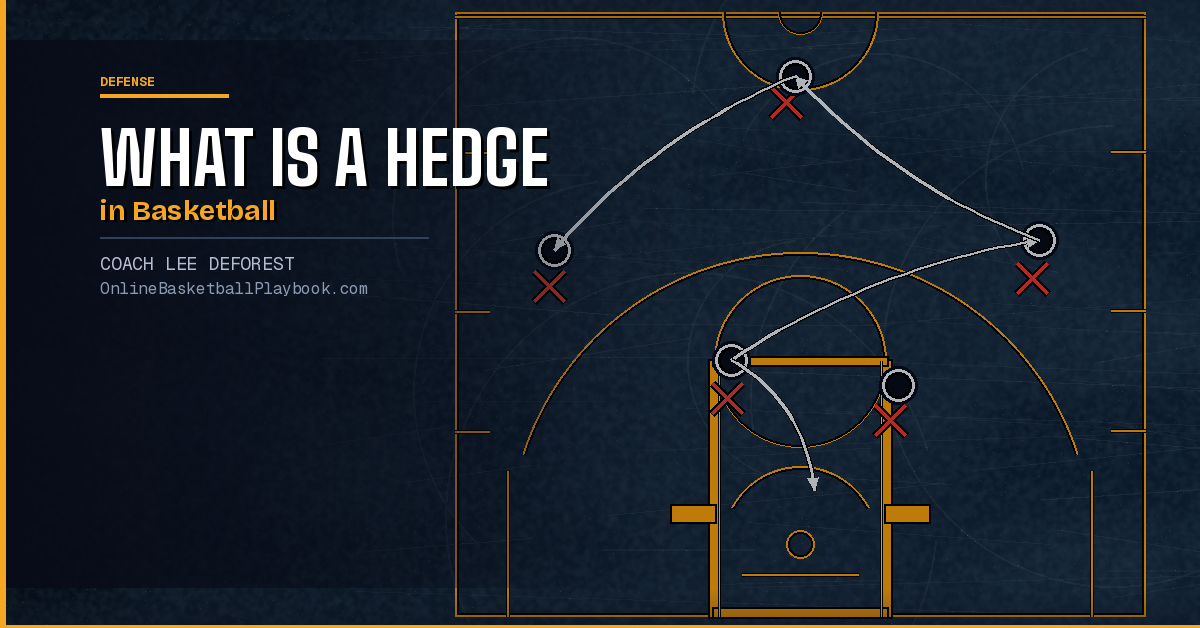
The hedge is a ball screen coverage that sends the big defender out aggressively to stop the ball-handler, buying time for the on-ball defender to recover. When executed correctly, it eliminates easy pull-up jumpers and forces the offense into a slower, predictable read.
What Is a Hedge?
A hedge — sometimes called a "show" or "hard show" — is a pick-and-roll defensive coverage where the screener's defender steps out sharply above the level of the screen to cut off the ball-handler's path to the basket. Rather than staying attached to the screener, the big defender temporarily becomes the on-ball defender, forcing the guard to slow down, retreat, or pick up the dribble. The original on-ball defender then fights over the screen and re-establishes position.
The hedge is one of the oldest and most recognizable coverages in basketball. At the NBA level, teams like the Boston Celtics under Doc Rivers and the Chicago Bulls under Tom Thibodeau built entire defensive identities around the hard hedge. The goal is simple: eliminate the ball-handler's straight-line drive. If the offense can run a guard into the lane off a screen against a dropping big, they have a layup or a midrange pull-up against a retreating defender. The hedge denies that comfort zone entirely.
There are variations in how aggressively a team hedges. A soft hedge involves a moderate step-out — enough to make the guard hesitate, but not so much that the big is exposed if the ball-handler reverses. A hard hedge or "hard show" is much more aggressive: the big steps fully into the path of the ball-handler, nearly parallel to the sideline, forcing an extreme slowdown or change of direction. Some teams instruct the hedging big to talk — "ball, ball, ball" — to alert teammates and to pressure the dribbler's decision-making.
"High hedge → automatic slip to the basket."
— Pick-and-Roll Reads, Online Basketball Playbook Vault
That principle is the core tension the hedge creates: the higher and harder the show, the more the screener's roll lane opens up. Understanding this tradeoff is essential for any coach who wants to use the hedge intelligently rather than just reactively.
How to Execute the Hedge
Proper hedge technique requires coordinated movement from two defenders — the on-ball guard defender and the screener's big defender — working in split-second sequence. Here is how each player executes their role.
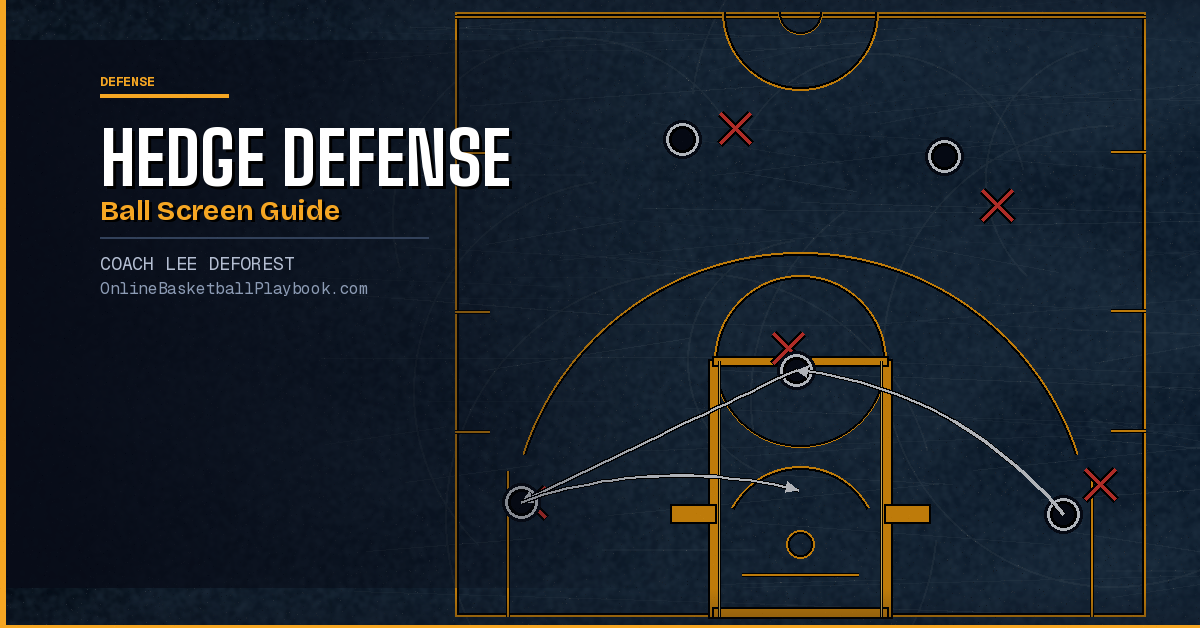
The Screener's Defender (the Hedger)
As the screen is set, the big defender must not get pinned behind the screener. The key is to read the screen as it is being set and anticipate the direction of the ball. The big takes a hard lateral step — one or two steps above the level of the screen — fully extending into the ball-handler's path. The hedging defender should be positioned with feet parallel to the baseline or sideline, body angled to force the ball-handler away from the paint.
The hedger must not switch. A hedge is not a switch — the big is buying time, not permanently trading assignments. After the on-ball defender recovers and makes contact with the ball-handler, the big snaps back to find the screener, who is now rolling or popping. Timing the snap-back is critical: hedge too long, and you leave the rolling screener open in the paint; hedge too briefly, and the ball-handler beats you around the corner before the on-ball defender can recover.
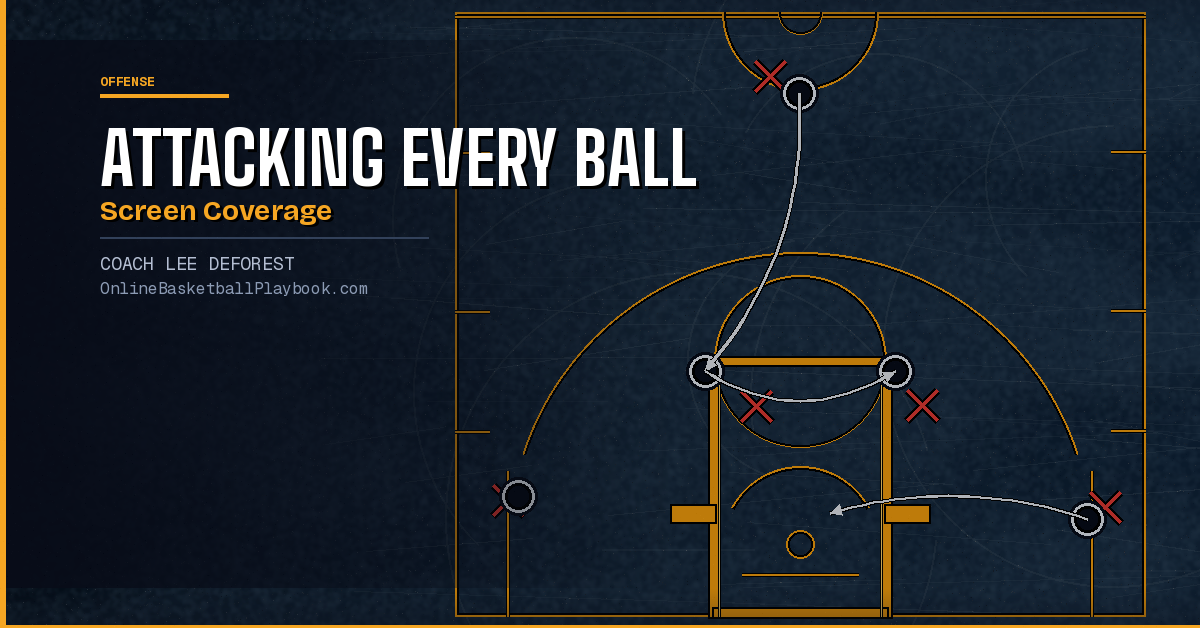
The On-Ball Defender (the Chaser)
The on-ball defender has to fight over or around the screen while the hedge is happening. The most common technique is to go "over the top" of the screen — pressing tightly to the screener's shoulder and chasing the ball-handler around the pick. The big's hedge is giving the chaser an extra half-second to recover. That half-second is the point of the whole coverage.
The on-ball defender should never go under a screen when the team is in hedge coverage — that defeats the purpose. Going under concedes the pull-up jumper, which the hedge is specifically designed to prevent. Some teams allow their guard to trail slightly and recover late when the big is hedging very hard, since the hedge itself is absorbing the ball-handler's speed.
When to Use the Hedge
The hedge is most effective against elite pull-up scorers who create offense off the dribble. When an opponent's ball-handler can stop and fire off a screen — think Steph Curry, Damian Lillard, or any elite college scorer in your region — a drop coverage invites a clean mid-range or three-pointer. The hedge forces those players to slow down, retreat, and reset. It disrupts their rhythm and keeps them out of their comfort zone.
The hedge is also useful when the screener is not a perimeter shooting threat. If the offensive big cannot reliably make shots beyond 15 feet, the rolling lane that a hedge opens up is a manageable risk. Your help defense can rotate to the rolling big, and you have accepted a contested shot in the paint over a straight-line drive for a pull-up or layup. That is a trade most coaches will make.
Before calling hedge coverage on a ball screen, ask: Can their screener shoot from the elbow or beyond the arc? If yes, a hard hedge may expose your big on the snap-back and leave the screener open for a catch-and-shoot. Consider a modified hedge or switching in that matchup.
The hedge tends to work better in half-court settings than in transition. In transition, screens are set on the move and the angles are harder to read. In a set half-court offense running a designed pick-and-roll, your defenders have time to see the action coming and get into position. Pre-scouting your opponent's ball screen tendencies — which side they prefer, how the screener likes to finish — makes the hedge far more effective because your big knows where to step before the screen is even set.
Finally, the hedge pairs well with active help defenders. When your weak-side players are alert and ready to rotate onto the rolling screener, the hedge is a low-risk coverage. When your help defense is passive or late, the hedge is a liability. The best hedge defenses are built from the back end forward — start by establishing that the roll will be covered, then let the big step out confidently knowing someone is behind him.
How Offenses Counter the Hedge
No coverage is free. The hedge creates vulnerabilities that good offensive teams will find and exploit if you do not have answers ready. Understanding how the offense attacks the hedge makes you a better defensive coach — and keeps your players from being surprised when the offense adjusts mid-game.
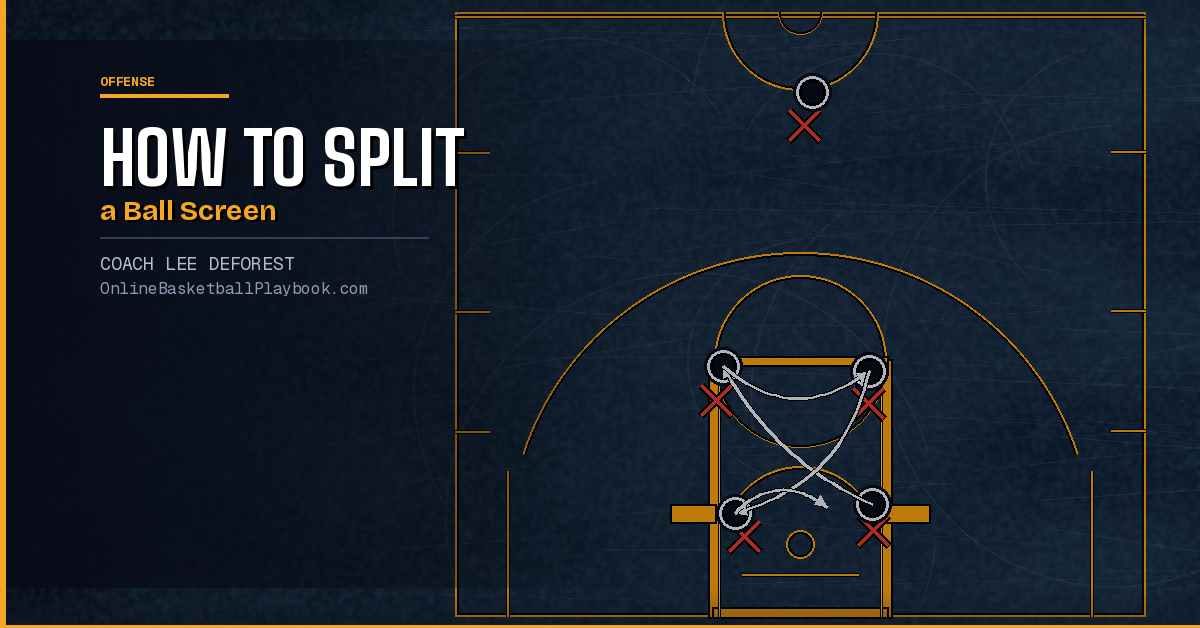
The Automatic Slip
The most common counter is the screener's slip. When the offensive big reads a high hedge coming before contact, they abandon the screen early and cut directly to the basket while the hedging defender is out of position. The ball-handler catches the big's defender fully extended above the screen level, the screener dives to the rim, and the pass arrives before the big can snap back. A committed hedge is the single clearest trigger for a slip action.
The Retreat Dribble and Reset
If the hedge is fully extended and the screener has rolled, an experienced ball-handler may simply retreat dribble away from pressure, reset the offense, and attack again. The hedge has not created a turnover or even a difficult shot — it has merely delayed the possession. Teams with patient, disciplined point guards will drain the clock, re-run the action, and look for the hedge to break down on the second or third iteration.
Screen-Rescreen
Another counter is the screen-rescreen. After the first screen is hedged, the screener re-sets a second screen — this time from a different angle. The hedging big has just finished snapping back and is unlikely to be in position to hedge again immediately. The second screen creates a completely different coverage problem. Offensive teams that run the screen-rescreen are specifically targeting the big's recovery time.
Pop to the Three-Point Line
When the screener pops to the perimeter instead of rolling, the big defender who hedged is now completely out of position. The ball-handler retreats, picks up the dribble, and fires a skip pass to the popping screener at the arc. The big has to close out from the paint — a scramble situation that great shooters love. This is why the hedge is risky against shooting big men.
Hedge vs. Drop Coverage
The hedge and the drop are the two foundational ball screen coverages, and every team is essentially choosing between them — or mixing them based on opponent and matchup. Understanding where they differ helps you decide which to use and when to combine them.
In a drop coverage, the screener's defender steps back below the level of the screen — "dropping" into the paint — and the on-ball defender goes over or under the screen independently. The drop concedes the ball-handler's mid-range pull-up but protects the rolling lane and keeps the big in position between the ball and the basket. It is a lower-risk coverage against roll-heavy screeners and against ball-handlers who are not elite pull-up threats.
The hedge is the opposite tradeoff: it protects against the pull-up and the drive but opens the roll lane and demands a perfect snap-back plus active help. Teams with elite rim protectors who can recover quickly — a mobile center who can step out, show, and then erase a roll — run the hedge effectively at the highest levels. Teams without that athleticism in the five position often find the hedge more difficult to sustain over a full game.
Many modern defenses blend both coverages within the same game. They may hedge against the opponent's best pull-up scorer and drop against a screener who attacks the roll relentlessly. Keeping the offense guessing about which coverage they will see on any given possession is itself a defensive weapon — it slows down the pre-planned reads and forces the offense to problem-solve in real time.
Key Coaching Points
When installing hedge coverage with your team, there are a handful of fundamentals that determine whether the coverage holds up under pressure. These points separate a hedge that stifles the offense from one that simply creates chaos for both sides.
First, communication is non-negotiable. The hedging big needs to call out "screen" early so the on-ball defender knows a pick is coming. Both players must know their assignment before the screen is set. A hedge that surprises your own on-ball defender is useless — the chaser needs to know the big is stepping out so they can time their recovery path.
Second, the hedge must be a wall, not a gamble. The big's job is to take space away, not to steal the ball. Reaching, swiping, or gambling for the deflection during the hedge pulls the big out of position and turns a contained situation into an open drive. Teach your bigs to be a body — stand tall, take up space, and let the on-ball defender come back.
Third, the snap-back must be automatic. As soon as the on-ball defender makes contact with the ball-handler, the big rotates immediately back to the screener. Drilling this snap-back timing — three-man shell drills are the standard tool — builds the muscle memory that makes the coverage reliable. The most common breakdown is the big hedging but not snapping back, leaving the roll wide open.
- Step out early — read the screen as it is being set, not after contact
- Be a wall, not a gambler — take space, do not reach or swipe
- Call "ball" while hedging to communicate with teammates
- Snap back to the screener the instant your guard re-establishes on-ball
- Help defenders must be ready to cover the roll before the big even steps out
- Scout the screener — if they shoot, consider a modified hedge or switch
- Drill the three-man shell (ball-handler, screener, two defenders) to build timing
Fourth, help defenders must be active. The hedge does not exist in a vacuum. Weak-side players need to shrink toward the paint when a hedge is happening, ready to tag the roll or cover the dump-off. If your help defense stays home on their man while the big hedges, the screener dives to an open catch at the rim. Every player on the floor has a job when the hedge is called.
Finally, know when to get out of the coverage. If the opponent has an elite shooting screener who is slipping or popping consistently for open looks, the hedge may be doing more harm than good. Have a secondary coverage — a switch, a modified hedge, or a drop — ready so you can make an adjustment at the timeout without overhauling your entire defensive game plan.
Want breakdowns of more defensive coverages and ball screen reads?
Join the newsletter and get new diagrams and coaching notes delivered to your inbox.
See it drawn up
Related diagrams


Keep Building
Related breakdowns