
How to Beat a 2-3 Zone Defense
The 2-3 zone stops man-to-man attacks cold. To crack it, you need to overload zones, occupy the high post, attack the short corner, and skip the ball faster than defenders can shift. Here is how.
Why the 2-3 Zone Works (and Where It Breaks)
A 2-3 zone is popular at every level because it is easy to teach, hard to dribble-penetrate, and clogs the paint. Two guards guard the perimeter; three defenders protect the lane, the blocks, and the baseline. The structure funnels dribble-drives into traffic, forces long two-pointers, and makes offenses uncomfortable by taking away their familiar man-to-man reads.
But every zone has seams — dead spaces that no defender can cover simultaneously. In a 2-3, these gaps appear at the elbows (between the guards and the wings), in the short-corner area on either side of the basket, and on any skip pass that travels the width of the floor. The 2-3 also carries an inherent liability: because it guards areas instead of players, the defense reacts to the ball. Make the ball travel faster than the defense can rotate and you will consistently find open shooters and cutters.
Understanding this is the first step. Coaches who fail against zones keep running man-to-man sets at zone matchups. The spacing is wrong, the timing is wrong, and the reads are wrong. Zone offense requires a deliberate structure: specific alignment, intentional ball movement, and players who move on the flight of the ball rather than standing to watch the pass arrive.
The 2-3 also invites complacency. It does not require switching, fighting through screens, or sprinting to stay attached to a cutter. That comfort is actually a weakness — when you force zone defenders to move repeatedly and make sudden decisions, the structure breaks down. The principles below are designed to create exactly that pressure.
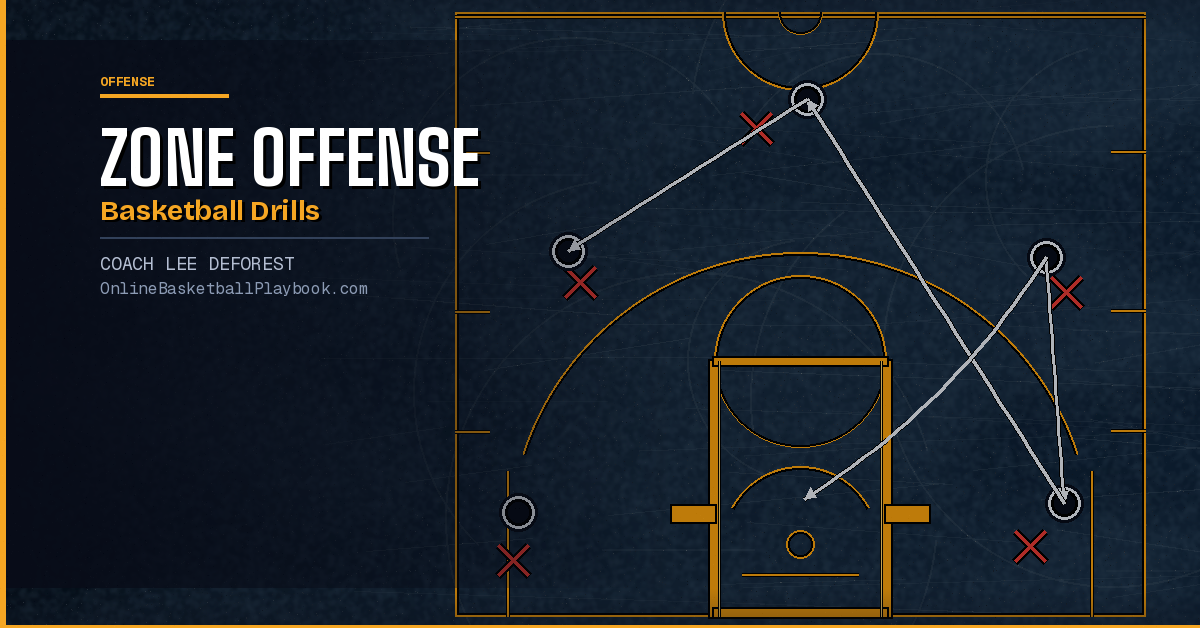
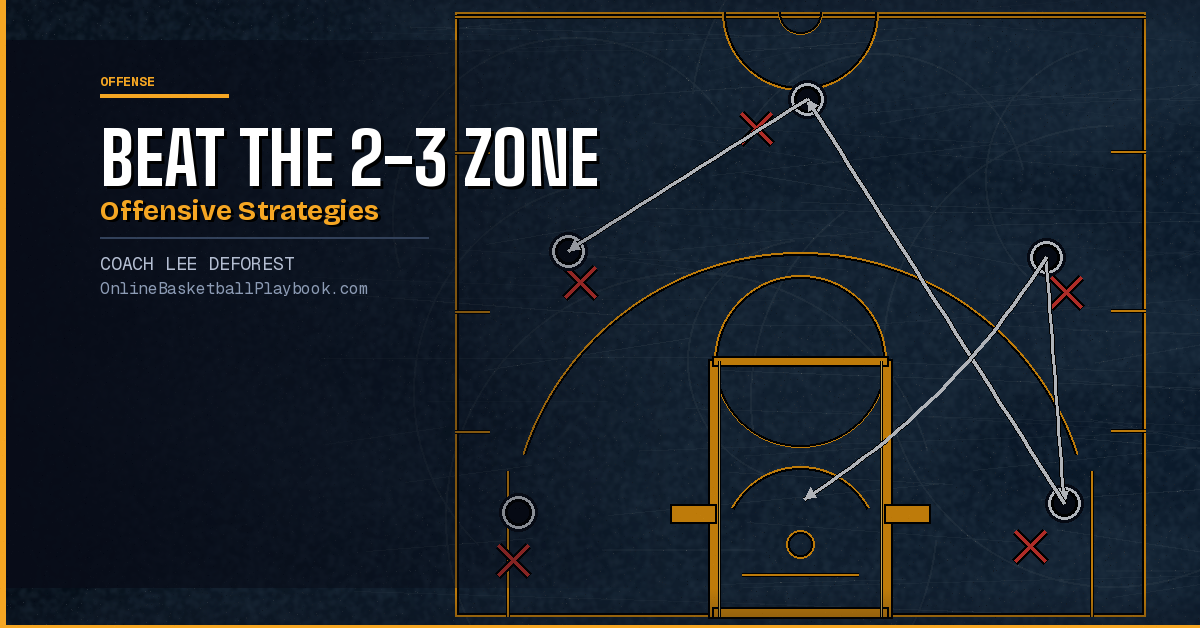
Occupy the High Post to Bend the Zone
The single most disruptive thing you can do against a 2-3 zone is put a player in the high post — the area at or above the free-throw line — and keep them there. The middle defender in most 2-3 schemes (often a wing or a power forward) has to honor that position. When they do, they are pulled away from their normal coverage responsibilities, and the entire zone's shape bends toward the ball side.
A high-post occupant who can pass is more valuable than one who can only score. When the ball enters the high post, the bottom three defenders face an impossible choice: collapse to stop a drive or pass, or stay home and allow a direct feed to a cutter or a corner shooter. Nearly every effective zone attack in the modern game uses a high-post hub. The big who catches at the elbow and finds the cutting guard or the skip recipient to the weak-side corner is the engine of zone offense.
Physically, the high-post player should flash to the elbow when the ball is on the opposite wing. They time the entry to arrive just as the ball is passed — appearing in the gap before the defense can recognize and close. Once there, they face up, read the defense, and make the quick decision: can I score? Can I feed the cutter diving baseline? Can I find the open corner shooter on a skip?
The high-post touch also sets up the high-low game. When the high-post receives the entry, a low-post player on the weak side seals their defender and dives to the ball-side block. That feed is one of the highest-percentage shots in basketball. Teams that master this combination force the defense to guard two serious scoring threats simultaneously — and the defense simply cannot do both.
"The two spots to teach kids are the short corner and the high post."
— Basketball Vault, Attacking Zone Defense
Attack the Short Corner — the Softest Spot
The short corner is the area just outside the paint on the baseline, roughly between the block and the corner. It is the softest spot against a 2-3 zone because the geometry puts the defense in an impossible position. The bottom defender nearest the ball has to choose between protecting the rim and stepping out to contest a shot or pass from the short corner. They cannot do both.
When the ball reaches the short corner, the high-post player or the weak-side big should cut immediately to the rim. The bottom defender who steps to the short-corner player has now left the lane wide open. This is a direct high-low read, and it is available every time you get the ball to the short corner with proper spacing. The timing is critical — the cut happens the moment the pass arrives in the short corner, not a beat later.
Getting to the short corner is the challenge. The most reliable way is an entry to the wing combined with a dribble toward the baseline. As the wing dribbles down, the bottom defender of the zone must decide whether to follow. When they hesitate, the wing dumps the ball to a cutter coming to the short corner. Against a more disciplined 2-3 that holds its bottom defenders, a corner pass that skips across to a forward cutting baseline can also find the short corner.
Players who want to thrive in zone offense should make the short corner their default home position on the weak side. They are available for the skip. They are in position to cut when the ball goes high. They occupy the bottom defender without requiring a dribble-drive to do it. Once that spot is filled consistently, the entire 2-3 structure tilts — one more defender is accounted for, one more seam opens elsewhere.
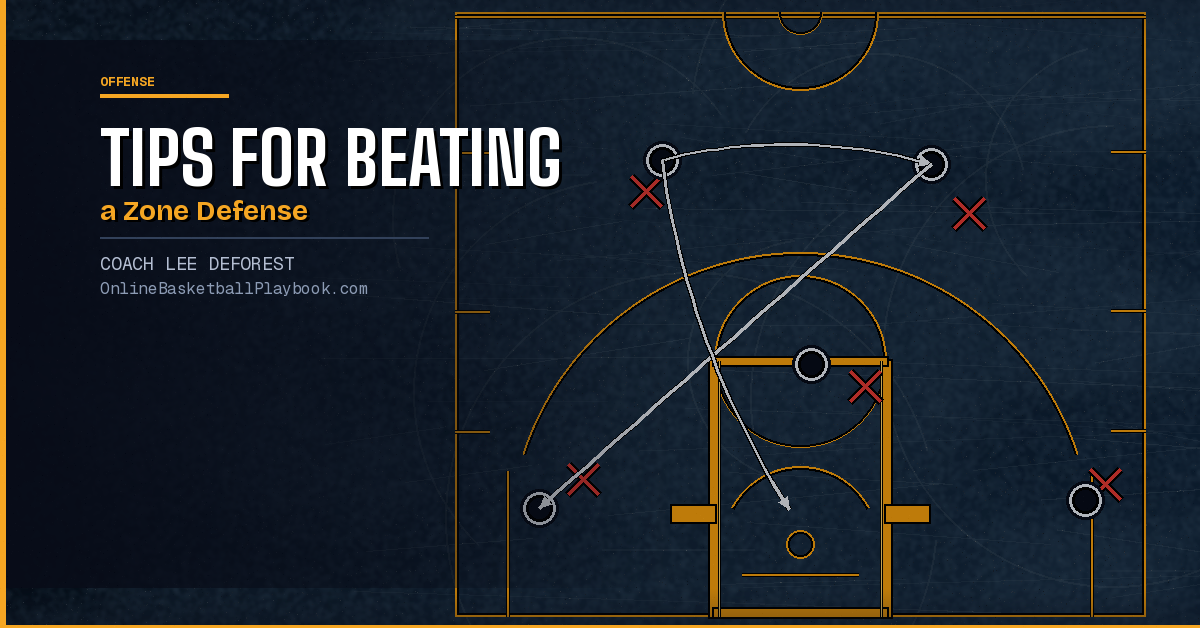
Overload One Side, Skip to the Other
Zone defenses are trained to shift toward the ball. Load one side with three offensive players — a wing, a corner shooter, and a short-corner cutter — and the zone will follow. Three defenders against three offensive players on one side of the floor seems balanced, but it creates a 2-on-2 situation on the weak side. That is the skip's target.
The skip pass is the killer blow against the 2-3. A ball swung quickly from corner to corner via a direct cross-court skip travels faster than any defender can sprint. The weak-side corner shooter who receives a skip has a half-second of open space — enough to catch and shoot before the nearest defender arrives. Teaching your players to move on the flight of the ball (not after it arrives) turns that half-second into a clean catch-and-shoot look.
Overload principles also create advantageous drives. When the zone collapses to match a 3-on-3 overload, the weak-side guard is caught between protecting the rim and closing out on a skip. A ball handler who reads that defender's positioning can attack the gap left by their indecision. A skip to the corner is the first threat; a drive off the skip catch is the second. Once defenses start cheating to the corner, the drive lane opens.
The key teaching point is patience. Young players see the skip lane and fire immediately, before the overload has done its work pulling the defense. The load must come first — three offensive players making purposeful movement on the ball side, forcing the zone to commit — and then the skip becomes available. Run the overload as a deliberate structure, not an improvised reaction.
Use Ball Screens on the Zone's Front
Ball screening the front of a zone is now standard practice at the college and professional levels, and it belongs in every coach's zone-attack toolkit. The concept is simple: screen the guard nearest the ball, forcing a coverage decision the zone was not designed to handle.
When a guard is screened at the top of the zone, the second guard cannot simultaneously stay home and help. The handler who uses the screen has three choices — attack the gap, hit the diving screener rolling to the basket, or kick to an open shooter on the skip. That is the same read as a man-to-man pick-and-roll, but the zone's rigid structure makes coverage even harder. Zone defenders are not accustomed to fighting through screens or recovering off rollers the way man-to-man defenders are.
The lob to the roller is a particularly reliable finish against ball-screen zone attacks. The middle defender in the 2-3 must honor the handler who turns the corner. When they do, the rolling big receives a direct feed with the backside defenders out of position. Practice the timing until the pass is in the air before the big finishes their roll — that is when the lob window is cleanest.
Combining a ball screen with a short-corner player and a skip outlet completes the picture. Screen the front guard, roll the big, place a shooter in the short corner, and keep a skip target on the weak side. The 2-3 simply does not have enough defenders to cover all four threats when they are properly spaced and timed.
Movement Rules: Never Stand Still
The single most common mistake against a zone is standing still. Players catch the ball, survey the defense, and remain stationary until the next pass. When no one moves, the zone resets, closes all the gaps, and dares you to shoot over it. The defense wins when the offense is stationary.
Cutters and flashers must move on the flight of the ball — while the pass is in the air, not after it lands. A guard who begins their flash to the high post as the wing pass is released arrives in the gap before the zone's middle defender can step to cover. The same principle applies to corner cuts, weak-side rotations, and short-corner dives. Timing is everything, and the timing trigger is the pass, not the catch.
Dribble penetration should be purposeful and decisive. A guard who penetrates to the elbow and draws two defenders has created a 3-on-3 elsewhere on the floor — but only if the ball comes out immediately. Holding the dribble while looking is wasted penetration. The best zone attackers use the dribble as a commitment tool: the moment a specific defender steps to them, they attack that defender's vacated space and distribute before the zone recovers.
Finally, after any dead ball or timeout, reset your spacing deliberately. Do not drift into a 2-3-friendly alignment by accident. Check that you have the high-post covered, the short corner filled, and skip outlets on both sides. Zone defenses want you to play into their structure. Forcing them to defend the short corner and the high post from the first possession of every possession puts the pressure where it belongs — on them.
- Flash to the high post on every wing-entry pass — make the middle defender commit
- Fill the short corner on the weak side as your default spacing position
- Skip pass first, drive off the skip catch second — teach both reads together
- Screen the front guard of the zone; lob to the roller when the middle defender steps up
- Move on the flight of the ball, not after the catch — timing is everything
- Overload one side, then skip — do not rush the skip before the overload has pulled the zone
- High-low feed from elbow to block is your highest-percentage finish; rep it daily
Want more zone-attack breakdowns, diagrams, and full-season play sets delivered to your inbox?
See it drawn up
Related diagrams


Keep Building
Related breakdowns