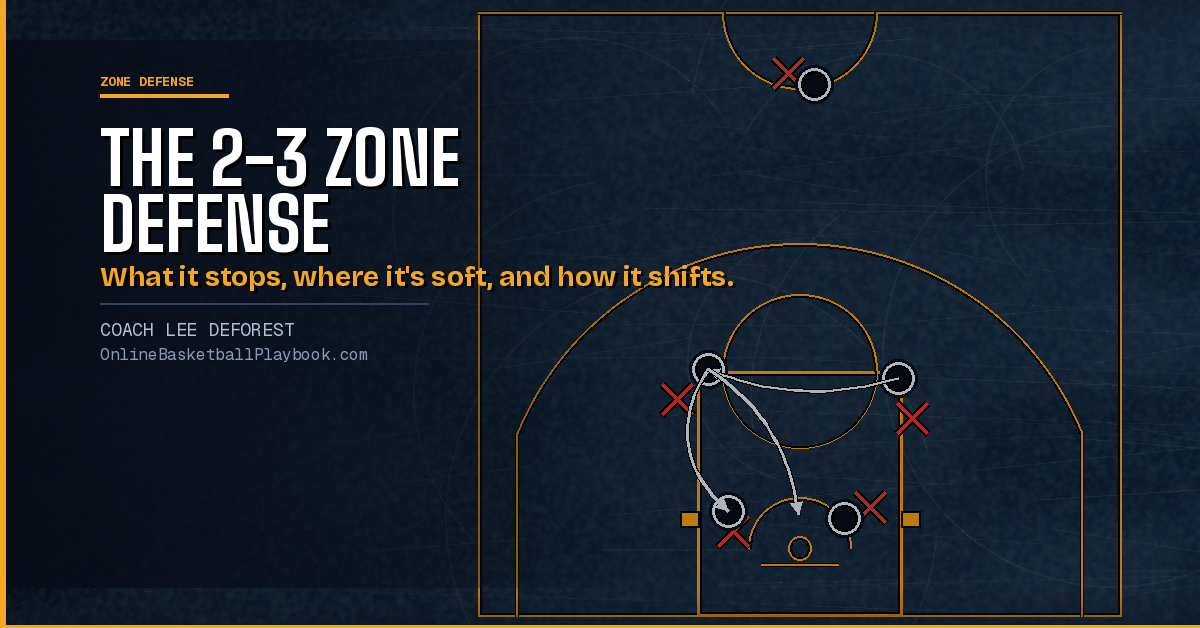

The 2-3 zone is the most-used defense in basketball — and the most misunderstood. Run it as a passive "stand and watch" shell and it gives up open threes. Build it on one deliberate trade and it becomes a wall.
The One Trade That Defines the 2-3 Zone
Every good 2-3 zone is built on a single, deliberate trade: give up the contested 10-to-12-foot pull-up, take away the corner three and the uncontested layup. That is not a gap in the defense — it is the entire design. The zone funnels dribble penetration toward the center inside the paint and accepts a tough mid-range two rather than a clean three or a rim shot.
"A tough ten-footer from the high post is the correct trade." — the governing principle of the modern aggressive 2-3 (Merrimack / Tandem system)
The math is why. A contested 10-to-12-footer is worth roughly 0.75–0.80 points per possession. An open corner three is worth about 1.15–1.20, and an uncontested rim shot 1.25 or more. When your zone breaks down and gives up a long contested two, that is the acceptable breakdown. When it gives up a corner catch-and-shoot or a clean post touch, that is the breakdown you fix in practice the next day.
The Alignment — Where All Five Defenders Start
The name "2-3" describes the shape: two guards up top, three across the back. But the details of where each defender starts are what separate a zone that works from one that leaks.
The two top guards (X1, X2) start about one step inside the three-point arc, close enough together that a pass to the high post or elbow is denied or forced into a lob. If a gap opens between them, the offense throws straight to the elbow and splits your entire defense in one pass. That gap is the number-one alignment error in the 2-3.
The back three are not a flat line. The two wing defenders (X3, X4) play at the free-throw-line-extended — forward of the block — so they can contest a corner catch immediately instead of sprinting six feet to get there. The center (X5) owns the paint and the rim.
Your wings start at the free-throw-line-extended, not on the block. If the wings sit on the block, every corner catch is a wide-open three because no one can close out in time. Forward starting position is the single biggest fix for a zone that gives up corner threes.
Position-by-Position Responsibilities
Each of the five spots in the 2-3 has a distinct, non-overlapping job. When players blur those jobs, two defenders guard the ball and someone is wide open.
The top guards (X1, X2)
Contain the ball on the dribble and force it one direction. Deny the pass back to the middle. On a skip or reversal, the off-guard immediately "bumps" to the ball — this jump-switch between the two top defenders is what keeps the ball out of the middle as it moves side to side.
The ball-side wing (X3 or X4)
Closes hard to the corner on ball entry with a specific technique: butt pointed toward the corner, shoulder to the baseline. Closing this way contests the catch and takes away the baseline drive in the same motion. The wing never surrenders the baseline — everything is funneled back inside to the center.
The center (X5) — the hub
This is the highest-demand position in the zone. The center defends the low post, contests every rim shot, covers short-corner entries, fights one-on-one against a high-post catch, and rebounds the opposite side. The whole defense lives or dies on this player's communication and one-on-one ability.
- X1 / X2 (top): contain, force one way, deny the middle, jump-switch on reversal
- X3 / X4 (wings): close to the corner butt-to-baseline, never give up the baseline drive
- X5 (center): protect the rim, defend the post, communicate the whole defense
- Weak-side wing: drop a foot into the lane, ready for the lob or backdoor cut
- Weak-side guard: stay above the foul line to cut off ball reversal
The Two Soft Spots — and How to Protect Them
Every defense has weaknesses. Good coaching means knowing exactly where yours are so you can protect them on purpose. The 2-3 has two.
1. The high post (elbow / free-throw line). A guard-to-high-post pass can split the whole defense. Two rules close it: keep the two front guards close enough together to deny that entry, and when the ball reaches the high post anyway, the center matches it one-on-one while the four perimeter defenders sprint to their corner-box positions and close out on shooters. The counterintuitive part: cushion the high post, don't body-deny it. The goal is eliminating corner threes, not eliminating high-post catches. A tough ten-footer from the elbow is the trade you want.
2. The short corner (the block-to-corner area just beyond the center's range). The primary answer: the center steps out to contest while the weak-side wing rotates under the basket to cover the dive. The secondary answer: trap the short-corner entry and force the offense to escape with a pass, with a third defender waiting to pick it off.
The Rotations — Corner, Skip, and High Post
A zone is only as good as its rotations. Three situations cover almost everything:
Corner entry (pass to the corner): the ball-side wing closes out; the center steps up toward the short corner; the weak-side wing drops to the paint; both top guards shift one step ball-side. This is your base "bump" rotation — everyone slides one position toward the ball.
Skip pass (ball reversed across the floor): the receiving wing must "wing-bump" — stunt with the outside foot and outside hand high, back to the corner — to slow the driving lane and cover a follow-up corner skip in one motion. The guards recover behind the stunt. This single technique is what stops quick reversals from turning into open weak-side threes.
Ball enters the high post: all four perimeter defenders sprint to their corner-box positions and the center goes one-on-one. The zone does not collapse on the center — collapsing is exactly what the offense wants, because it opens the kick-out three. Stay expanded and make the high post score over a single contest.
The Modern, Aggressive 2-3 (the Tandem)
The textbook 2-3 gets called passive. The modern version — built at Merrimack and known as the "Tandem" because the two bigs play one-up, one-back instead of flat — is the opposite: it creates turnovers, limits threes, and limits uncontested rim shots. It graded out at .804 points per possession over roughly 1,900 possessions, fourth in Division I in 2023-24.
It runs on five non-negotiable rules that travel to every zone you'll ever coach:
- Move on the flight of the ball — get to your spot before the catch, not after
- Hands never below the waist — one team averaged 9.8 steals a game from this alone
- Never get screened — fight through or jump-switch; no free cuts through the zone
- Anticipate — read the next pass before it happens
- No shooter catches and shoots in their spot — take away the attempt, not just the make
Notice these are habits, not diagrams. Teach them as vocabulary and they upgrade your man-to-man defense too.
Ball Screens and Baseline Out-of-Bounds — Where Zones Get Torched
Two situations are routinely ignored in zone teaching, and both are where good offenses score easy buckets against a 2-3.
Ball screens against the zone. "Zones don't guard the ball handler" is a myth that dies the moment someone runs a pick-and-roll at your two top guards. The rule depends on the handler's shooting: against a non-shooter, the guard goes under the screen and the partner stunts to buy recovery time; against an elite shooter, the guard goes over. The universal principle — never let the offense reject the screen. Force the handler to use it by jumping to his outside hip, and funnel the drive back to the center.
Baseline out-of-bounds (BLOB). This is the single most common breakdown point for zone teams. The recovery trigger that applies to every BLOB set: the moment the ball enters a wing or slot, your top guard sprints to cover the uncovered wing while the ball-side big stunts to buy time. The classic failure is the top guard hesitating while the big over-commits — leaving both the wing and the stunt spot open at the same time. Drill the recovery, not just the alignment.
How to Teach the 2-3 — Drills and Progression
You cannot install a zone with a whiteboard. Build it in stages, in the body, with the soft spots stressed on purpose.
Stage 1 — Shell, ball reversal only. Five defenders, ball moving guard-to-guard and guard-to-wing. No drives yet. Stop the drill every time someone's slide is late or a gap opens between the top two. Build the habit of moving on the flight of the ball.
Stage 2 — The wing-bump drill. Rep the outside-foot stunt, hand high, recover to the corner box, over and over, until it's automatic. This one technique stops skip passes and reversal threes.
Stage 3 — Attack the soft spots from the offense. Put your scout team in a high-post flash, a corner skip, and a short-corner entry — the exact three killers. Your defenders feel the weaknesses and learn precisely what they're protecting.
Stage 4 — Live, with the trade scored. Play live and award the defense for forcing a contested mid-range two; charge it for a corner catch with no closeout. You are coaching the trade, not just the rotations.
The Common Mistakes That Break the 2-3
A gap between the top guards. The fastest way to lose a zone — it opens the high-post split. Keep them connected.
Wings starting on the block. Guarantees open corner threes. Start at the free-throw-line-extended.
Collapsing on the high-post catch. Every defender dives at the ball, and the offense kicks out for an open three. Stay expanded; make the high post score over one contest.
Treating it as passive. A zone that stands and watches gives up everything the math hates. Hands up, move on the flight of the ball, take away the shooter's spot.
Silent defenders. The center has to talk the whole defense. A quiet 2-3 is a broken 2-3.
When to Run It — and When to Switch to Man
The 2-3 is your best call when the opponent has a dominant interior player and below-average shooters — it walls off the paint and dares the weak shooters to beat you from outside. It's also a strong change-up to break an offense's rhythm.
It has a built-in switch trigger: if the offense keeps attacking the high post or short corner and your center is struggling one-on-one, the zone is being exploited — switch to man before the third easy look, not after. The other trigger is a team with multiple corner shooters who can all catch a skip and fire; the 2-3 can't cover every corner against that roster.
One coaching tip for switching mid-possession: use a "stay" call instead of "switch." A quiet, counterintuitive signal word keeps the opponent from knowing you've changed coverage.
Get Free Coaching Notes
Join the Online Basketball Playbook newsletter for new playbook breakdowns, drills, and practice-ready install ideas.
Get Free Coaching NotesSee it drawn up
Related diagrams
Keep Building
Related breakdowns
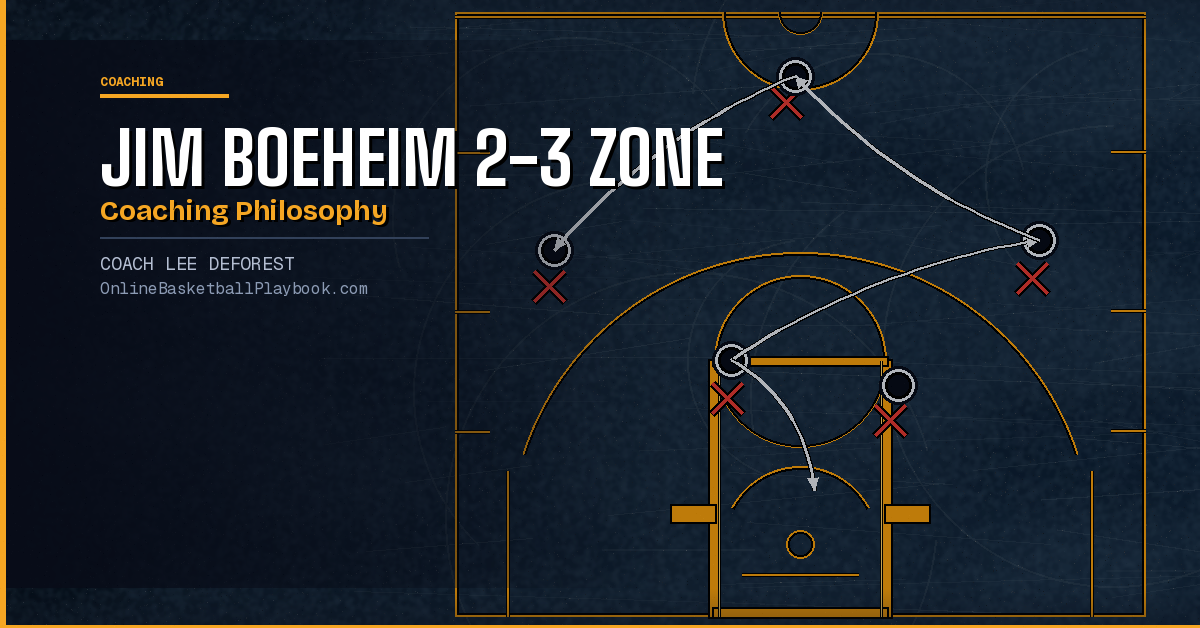
Jim Boeheim 2-3 Zone System and Coaching Philosophy
Jim Boeheim 2-3 Zone System and Coaching Philosophy