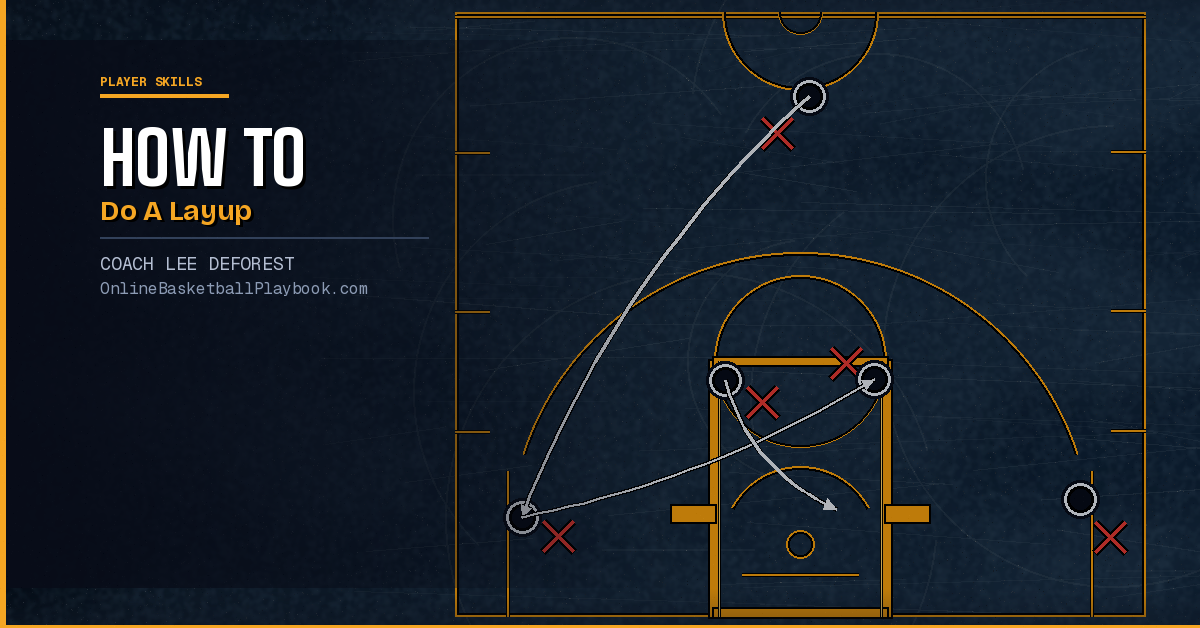

How to Do a Layup
The layup is the highest-percentage shot in basketball — and the most commonly botched. Get the footwork right and everything else follows. Here is exactly how to teach it, step by step.
Why Footwork Comes Before the Finish
Most players learn the layup backwards. They learn to lay the ball up first and deal with footwork as an afterthought. That approach produces players who can make a layup in a drill but blow it when a defender appears — because they never built the body control that allows them to absorb contact, change angles, and stay balanced through the finish.
The correct sequence is: body control first, finish second. Coaches Jerry Krause and Don Meyer both taught this explicitly. Krause called it the "Quick" stance system — four foundational body actions that underpin every skill in basketball: quick starts, quick steps, quick turns (pivots), and quick stops. Until a player can stop under control, they cannot finish under control. The layup is the end product of that system, not the starting point.
This matters at every level. Youth players who rush to the basket without gathering their footwork develop bad habits that are extremely difficult to unlearn. A player who consistently uses a one-foot, uncontrolled jump into a layup will struggle against any defender who applies late pressure. A player who gathers with a proper jump stop and chooses their finish based on the defense is a problem for anyone guarding them.
Before you teach your players to make layups, teach them to stop. Everything from here follows that foundation.
The Jump-Stop Foundation
The jump stop is the most important single skill in layup teaching. It is the two-foot landing that preserves a player's right to choose either foot as their pivot foot — and it is the gathering action that happens just before the layup itself.
The cue is simple: kill your dribble, take a small bunny hop, and land simultaneously on both feet. Both feet hit the floor at the same moment. Not left-then-right or right-then-left — simultaneously. That simultaneous landing is what gives you options. You can now pivot off either foot, pump-fake, pass, or gather for your finish.
Coach Mike DeVillibis — one of the most thorough individual-skills teachers in the game — recommends a strict rule for early-season teaching: use jump-stop layups only. No other gathering footwork until the jump stop is automatic. The reason is strategic. The jump stop forces players to collect themselves before attacking the rim. It naturally trains the habit of dealing with help defense instead of floating carelessly through the lane hoping for a friendly whistle.
DeVillibis's teaching cue is worth memorizing: "Catch the ball with your feet in the air — it allows you to be balanced." That phrase reframes what the jump stop actually is. You are not stopping after the layup. You are gathering your base in the air so that when you land, you are already in control and ready to make a decision.
Run this as a standalone drill before you ever combine it with a finish. Players dribble to an area near the basket, kill their dribble, jump stop, land, and hold the position. Coach checks feet, balance, and body height. Get two or three minutes of clean reps. Then add the finish.
Step-by-Step Layup Mechanics
Once the jump stop is clean, you can build the standard layup on top of it. Here is the full sequence from dribble approach to finish.
The Approach
Drive toward the basket at game speed. The angle of approach should be at roughly 45 degrees to the baseline — this gives you the best angle to use the backboard and enough room to extend away from the defender. Straight-line drives down the lane are harder to finish because the defender stays in front of you. A diagonal approach lets you go around the defender and use the rim as a shield.
Stay low as you approach. The tendency for young players is to rise up too early, which gives the defender time to recover and time to foul. Stay downhill until your last dribble.
The Last Dribble and Gather
Your last dribble should be your hardest and lowest. Push the ball hard into the floor, and as it comes back up, begin your gather step. Do not take a high, floating final dribble — that gives a long-armed defender the opportunity to poke it free.
From the gather, you have two options depending on your comfort level and the game situation. The first is the traditional one-two step (stride stop): left foot, right foot for a right-hand finish, or right foot, left foot for a left-hand finish. The second, and more fundamentally sound option, is the jump stop gather: two feet land simultaneously, then you push off for the finish. Both are legal. The jump stop gather tends to produce more body control and is the one DeVillibis recommends teaching first.
The Knee and the Lift
Drive the inside knee up as you finish. For a right-hand layup, your left knee comes up sharply on the jump — this adds power to your lift and protects you from contact. Do not float sideways through the lane. Go straight up. The knee drive is what separates a strong finish from a soft one.
The Release
Extend the ball off the fingertips at the peak of your jump. Aim for the top corner of the box on the backboard — that small square in the upper corner nearest the basket. Hitting that spot at the right angle almost always results in a made layup. The ball should roll off the fingertips softly. A hard, slapping release almost always results in a clank.
Keep the elbow soft throughout. A locked elbow produces a hard, line-drive finish. A soft, fluid elbow lets the ball float up and drop through.
The Landing
Land on both feet, bent knees, balanced. Do not watch the ball. Get your body positioned for any rebound. This is a competitive habit — players who watch their layup and assume it goes in get out-rebounded when it doesn't. Land ready to play.
Train a finish menu — regular, opposite-hand, power, reverse, floater, and Euro step — and choose by the help. Use the rim as a shield and finish through contact.
— Finishing & Footwork, Basketball Vault
Your Finish Menu: More Than One Layup
Here is where most players stop developing. They learn one finish — usually the standard right-hand layup on the right side — and call it done. That is one move against a defense that has five defenders who will all take different angles and apply different pressure. You need a menu.
The Standard Layup
Right-hand finish off the right foot, left-hand finish off the left foot. Aim for the backboard box. This is the layup to own first. Both hands, both sides. Until a player can finish with either hand equally well, they are playing at half-capacity.
The Power Layup
Two-foot jump, both feet leaving the floor simultaneously, ball held in two hands and extended through contact. This is the finish when the defense is in front of you and contact is coming. You cannot be stripped easily if you hold the ball with two hands, and the two-foot jump gives you a stable base to absorb contact. Use it when you have beaten your defender but know the help is waiting. Interior players should rep this daily — it is their primary finish in traffic.
The Opposite-Hand Layup
Right-hand layup on the left side, or left-hand layup on the right side. This becomes necessary when a defender takes away your dominant hand and forces you to use the off side. Train it just like your dominant side — same mechanics, same backboard target, same knee drive. The only difference is the hand. Players who have not trained this will instinctively reach across their body with their dominant hand, which leads to turnovers and blocked shots.
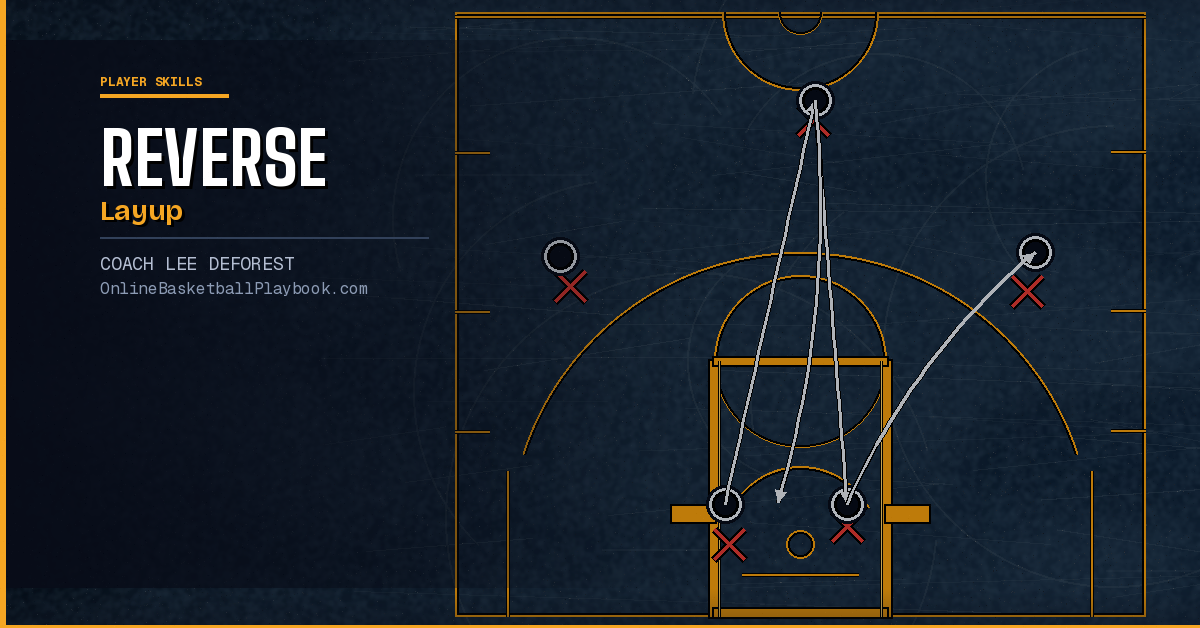
The Reverse Layup
Used when driving along the baseline, underneath the basket. Instead of trying to force a layup from an angle that the defense has cut off, you continue under the basket and finish from the other side — using the rim itself as a shield between the ball and the shot-blocker. Coach Pavel Kokoškov includes this in his guard finishing battery as a must-have. The key: keep the ball in the outside hand as you go under the basket, and flip it up softly from below. Do not try to arc it hard — it needs to be placed, not thrown.
The Floater and Runner
The floater is a mid-range finish released earlier than a layup — before a help defender can get vertical. Think of it as a layup launched from eight to twelve feet rather than from directly under the basket. You gather in the lane, extend the ball high off the fingertips, and release with a high arc that drops the ball through the basket from above. The arc is what defeats the shot-blocker — they get to the spot where you normally release, but the ball is already past them.
Kokoškov coaches the floater off the proper foot: the same lift-leg mechanics as the layup, just released earlier in the approach. The runner is the same concept from farther out and more on the move. Both should be trained off each foot in both directions.
The Euro Step
Two steps in opposite directions to evade a help defender. First step goes one way to make the defender commit; second step goes the other way as you finish. It is legal under the traveling rule because the two steps are your allotted gathering steps after picking up your dribble. The Euro step is most effective against aggressive help defenders who anticipate your path. The key is that the first step must be believable — if the defender does not react to it, the move provides no advantage.
Do not teach the floater or Euro step before a player has a clean standard layup with both hands. Those advanced finishes require the same body control and footwork discipline as the basics — players who skip the fundamentals to learn the Euro step tend to travel on it every other attempt, because they never built the underlying gather mechanics correctly.
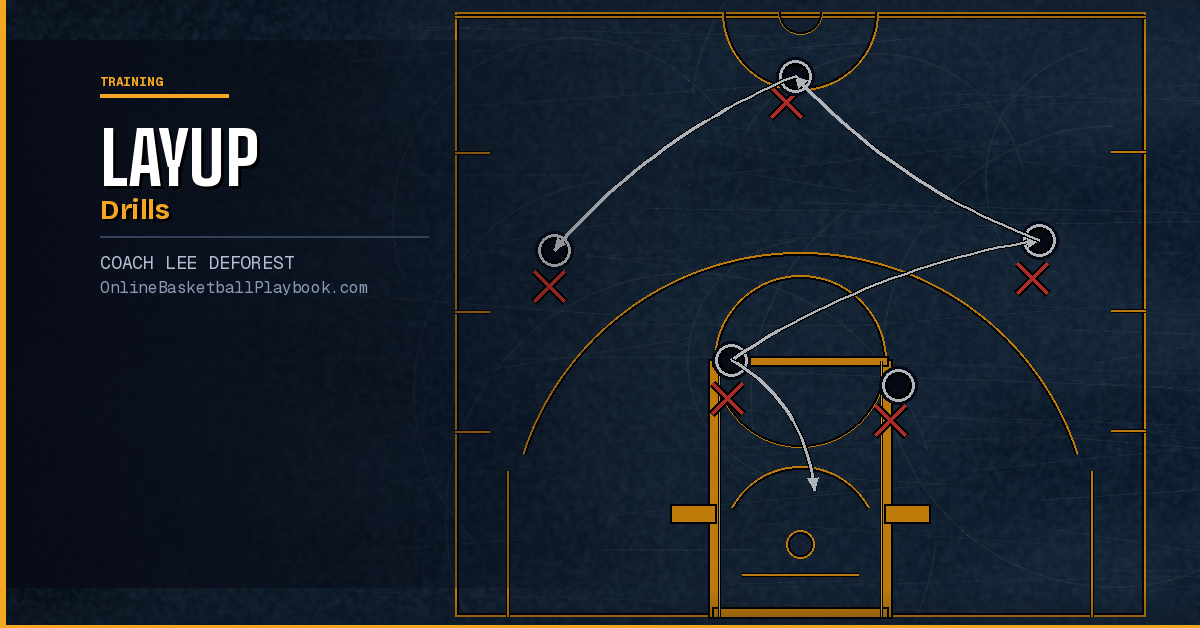
Drills to Build It in Practice
Teaching layups is not simply a matter of running layup lines. Layup lines are one of the least effective ways to build finishing skill — they are low-speed, uncontested, and repetitive in a way that breeds false confidence. Use targeted drills that build real skill.
Jump-Stop Layup Drill
Players dribble from the wing at 45 degrees, kill the dribble at the elbow of the lane, perform a clean jump stop, gather, and finish. Coach watches for simultaneous foot landing, balanced body position, and a clean knee-drive on the finish. Run this both directions. Do not move on until players consistently land balanced before their finish — that is the only standard that matters at this stage.
Mikan Drill
The classic two-hand power layup drill under the basket. Player alternates sides — finish right, rebound before it hits the floor, step to the left side, finish left — continuously for a set time or make count. This builds the power finish, the opposite-hand finish, and the footwork of moving laterally under the basket. It also builds concentration because the drill is harder to stay focused through than it looks. Set a goal of ten makes in a row before moving to the next station.
Finish Menu Drill
Assign a finish based on how the defender plays. Player drives from the wing; coach (or a live defender) takes a position at the rim. Player reads the defender's angle and chooses: standard, reverse, floater, or power. This is where the menu becomes real. Players who have only drilled one finish will be stuck when the standard lane is taken. Players who have drilled the full menu make a quick read and choose correctly.
Offensive Pivoting and Passing Breakdown Drill
This drill — drawn from John Kimble's footwork system — works in three-person groups. One player dribbles, kills the dribble, and works through the full pivot sequence (jump stop, step-out, rip-through) against a live defender. A third player catches and finishes at the rim. Rotate every 55 seconds. Run two rounds per group. Six minutes total covers all three positions, both pivot feet, and links the full footwork-to-finish chain in a competitive setting. This belongs in pre-practice warm-up, not as a standalone drill — it trains multiple skills simultaneously.
Pressure Finish Drill
Player drives at game speed with a chaser running alongside them from behind. The chaser cannot block the layup but applies body pressure through the finish. This replicates the real game experience of a longer athlete catching up on a drive. Players learn to gather faster, protect the ball higher, and use their knee drive to shield the finish. No defender on-ball — just the chaser. Simple and effective.
Common Mistakes and How to Fix Them
After working with teams across age levels, certain layup errors show up again and again. Here is what to watch for and what to say.
Floating Sideways Through the Lane
The player drives the lane but drifts horizontally as they finish rather than going straight up. This produces low-percentage circus shots and makes them easy to foul. The fix: drive the knee up. When the inside knee comes up sharply, the body goes vertical. Cue players: "Go up, not sideways." Have them do the drill without moving — stand flat-footed and practice the knee drive until it is automatic. Then add the approach.
Taking a High, Floating Final Dribble
The last dribble bounces high and lazy, giving defenders time to read and react. Fix: emphasize that the last dribble is the hardest, not the softest. Tell players to punish the floor with that last dribble. It sounds counterintuitive but it is correct — a hard final dribble comes back up fast and clean, making the gather smooth. A lazy final dribble leaves the ball hanging in the air where anyone can reach it.
Releasing Too Early or Too Late
Too early (releasing from below the rim) produces a flat, line-drive finish that usually hits the front of the rim. Too late (trying to finger-roll while falling away) produces a weak, off-target release. Fix: set a physical target. Walk players to the rim and point to the top corner of the backboard box. Make them touch it. That is their visual target every time. Repeat with two or three live makes from close range at low speed before adding the approach. Anchoring the target in their visual memory makes it easier to replicate at game speed.
Using Only the Dominant Hand
A player who can only finish with their right hand is giving the defense a simple solution: push them left. Fix: left-hand finishes are non-optional in practice. Every layup drill runs both ways. If a player makes five right-hand layups in a row but misses two left-hand attempts, they stay at the left-hand station until they get clean makes. Players resist this at first. They come around when they realize how many layups they miss in games because a smart defender pushed them to the weak side.
No Body Awareness at the Rim
Players finish and then stand watching the shot instead of landing and positioning for the rebound. This is a habit issue. Fix: make landing a teaching point explicitly equal to the finish. In every drill, the finish is incomplete until the player has landed on both feet and is square to the basket. Count a miss that is followed by an offensive rebound as a make in drill scoring — it reframes how players value the position after the finish.
- Jump stop first, every season: Enforce the DeVillibis rule — jump-stop layups only for the first two to three weeks. Players who resist are players who have never been made to gather under control. Hold the standard.
- Last dribble is the hardest dribble: Drill players to punish the floor with their final dribble before the gather. This creates a fast, clean pickup and eliminates the lazy floating last bounce that defenders steal.
- Both hands, both sides, both finishes: Every layup drill runs left and right. Standard finish and power finish. No exceptions. A one-handed finisher is a 50% player at the rim — the defense figured that out before you did.
- Use the backboard box as a physical target: Walk players to the rim and make them touch the top corner of the box before drilling. Anchoring a visual target produces more consistent releases than coaching the release in the abstract.
- Build the finish menu progressively: Standard layup → power layup → opposite hand → reverse → floater. Do not teach the floater or Euro step until the standard finish is clean with both hands. Sequence matters.
Want more basketball coaching strategies and drills?
Keep Building
Related breakdowns