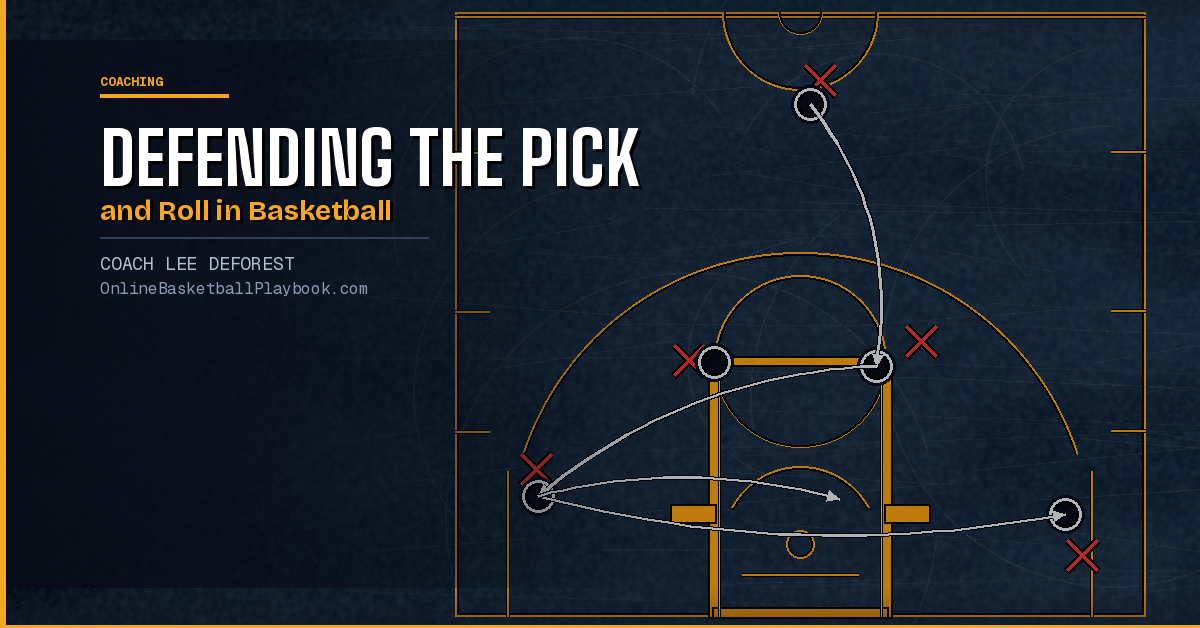

Advanced Strategies for Defending the Pick and Roll in Basketball
The pick and roll is the most common action in basketball. If your defense doesn't have a clear, practiced answer for every coverage situation, elite ball handlers will expose you every single time.
Understanding What the Offense Is Reading
Before you can defend the pick and roll effectively, you need to know exactly what the offense is trying to do. The best offensive systems — from Brad Stevens' Butler teams to Billy Donovan's Florida spread to NBA programs built around pace and space — don't just "run a play." They teach their players a decision tree that maps directly to whatever your defense gives them.
Here's the core principle: the ball handler reads your two defenders — the on-ball defender and the big — and picks the correct answer. The screener reads the defender's height and positioning before contact and reacts accordingly. Every read the offense makes is a direct response to your coverage call.
That means your coverage call is not just a tactical preference. It is a message to the offense about where they should attack you. The teams that struggle most defending pick and rolls are the ones that call a coverage without understanding what the offense's counter will be — and therefore never practice defending the counter.
The Lickliter and Walthall taxonomy from Iowa names eight distinct ball-screen reads: turn corner, hesitate, split hedge, fake split, reject, shoot behind, re-screen, and early slip. Each read corresponds to a specific defensive alignment or mistake. Your goal as a coach is to take away the highest-value reads — and be comfortable giving the offense the lowest-value ones.
The screener's reads are just as important. Elite offensive systems teach the screener to choose between rolling to the rim, popping to space, short-rolling to create a triangle, re-screening, setting a flare screen, or rolling to the opposite block. The coverage you call determines which of those six options becomes the automatic answer. Know what you're inviting before you call the coverage.
The Five Core Pick-and-Roll Coverages
There are five coverages most coaches use in some combination: drop, hedge or show, switch, blitz or trap, and ICE or force. Each has a specific purpose, a specific vulnerability, and a specific offensive counter. Strong defensive teams install at least two or three, practice the counters, and call them situationally based on the opponent's personnel and the game situation.
A single-coverage team is easy to solve. A scout who watches two games will find the seam and put it in the game plan. The coaches who defend pick and rolls at the highest level — NBA and elite college — use coverage packages that present different problems on different possessions. The offense never gets comfortable.
That said, don't overcomplicate it at the high school or youth level. Mastering one coverage deeply beats half-executing three. The goal is clarity: every defender on the floor knows exactly what to do before the screen is set, knows what the offense will try, and has practiced the recovery or closeout that comes next.
The ball handler reads exactly what the defense shows — and the offense's best answers are the direct mirror of the coverage: vs. a trap or blitz, drive away to space, split, or dribble around the second defender; on a drop, attack the dropped big in space — it's no longer a pick and roll, it's a one-on-one.
— Pick-and-Roll Reads, Basketball Vault
Drop Coverage — When and How to Use It
The drop is the most common NBA coverage of the past decade and it has filtered down to every level of the game. The concept is simple: the big drops back toward the paint, staying between the ball handler and the basket, while the on-ball defender chases over the top of the screen.
Drop coverage eliminates the lob to the rolling big. It keeps the defense connected to the basket and makes the rim more difficult to attack in transition. Against non-shooting bigs who anchor their offense inside, drop is an excellent starting point.
The vulnerability is real: a ball handler with range can pull up in the mid-range or beyond the arc on top of the drop. The dropped big cannot recover in time to contest a confident pull-up shooter. If your opponent's ball handler shoots the mid-range with efficiency, drop coverage becomes a gift. You are inviting a shot he makes regularly.
The on-ball defender's job in drop coverage is demanding. He must fight through the screen — going over the top — without losing ground. If he goes under the screen, the ball handler has an uncontested pull-up at the exact spot the big dropped out of. That is the worst possible outcome in drop coverage. Your on-ball defender must stay connected to the ball handler's hip and make the coverage work from the top side.
A practical adjustment: tag the roller. The weak-side help defender — often the corner or wing — takes a step toward the lane when the ball screen fires. If the big rolls early, the tag eliminates the quick dump-off. If the big pops, the tag man recovers to the corner. This is a simple but necessary complement to drop that prevents the roll-man dump from becoming an automatic layup when the big drops but the ball handler turns the corner anyway.
Hedge and Show — Taking Away the Downhill Drive
Hedge and show coverages send the big out to cut off the ball handler's driving angle, buying time for the on-ball defender to recover. The big steps out — showing presence — to force the ball handler to pick up his dribble or retreat, then sprints back to recover to the roller or the paint.
A hard hedge sends the big out aggressively, two to four feet beyond the screen, with the explicit goal of stopping the ball handler's momentum entirely. This is the coverage that generates the split move: the ball handler "fires the dribble back to the screener's butt," threading between the hedger and the trailing on-ball defender to find the open lane. Brad Stevens named this the split read precisely because a hard hedge creates that gap when the big over-commits.
Against a hard hedge, offenses also use the hesitate read — a change of pace off the screen that freezes the hedger as he's coming out, then acceleration once the hedger is committed. The sequence is: hedge out, ball handler slows, hedger slows in response, ball handler attacks the recovering big in space. A guard who can change pace off a ball screen with genuine hesitation skill will score on a hard hedge team repeatedly unless the scheme is adjusted.
The soft show is a middle-ground approach. The big shows presence without fully committing — two steps out, not four — and returns to the paint before the ball handler can fully exploit the gap. Soft show limits the drive less than a hard hedge, but it also reduces the exposure to the split move. Against a ball handler who is a better driver than shooter, soft show is often the better balance.
The key teaching point for hedge and show: the big must communicate with the on-ball defender before the screen is set. The big calls "screen" so the on-ball defender knows a hedge is coming and can fight over the top. Without that communication, the on-ball defender may go under the screen, the big hedges, and there's no one attached to the ball handler's hip to recover.
Switch and Blitz — High-Risk, High-Reward Options
Switching every ball screen has become standard across the modern NBA and has spread to college programs that recruit versatile defenders who can guard multiple positions. The logic is simple: if every screen is switched, the offense never gets a favorable mismatch from the pick-and-roll action itself. The coverage eliminates the recovery problem entirely.
But switching creates its own problems. After a switch, the offense has a predetermined answer: post the smaller defender immediately, or arc the big screener below the block for a post opportunity against the guard. Elite offensive systems have named counters specifically for the switch — in the CSKA Moscow playbook, these are called Ghost, Gut, Backdoor, Flare, and Out-Chase, each targeting a different switching mistake.
The most important switch counter at any level is the post-up. When a guard is switched onto a bigger screener, the screener calls for the ball immediately and establishes position. If your team switches but your players don't know how to hold the switch — staying connected to the ball handler to prevent the ball reversal and quick entry — the switch becomes a shortcut to easy post points.
Blitz or trap coverage sends both defenders at the ball handler simultaneously after the screen. The goal is a forced turnover or a rushed decision. Against a ball handler who doesn't handle pressure well, the blitz can generate chaos. Against a disciplined guard who throws back to the corner and lets the offense run a four-on-three, the blitz is a liability.
The offensive counter to a blitz is clear: drive away to space, split the two defenders, dribble around the second defender, or throw back to the corner and let the remaining offensive players create a numbers advantage. A team that blitzes without practicing the rotation recovery on the back end will give up corner threes and short-roll layups on every blitzed possession. The big recovers, the on-ball defender sprints back, and the weak-side defenders rotate to take away the skip pass and the corner — that four-man coordination has to be drilled or the blitz fails.
Before you install the blitz or trap in your defensive scheme, run a drill where the offense knows it's coming — two guards attack the blitz, throw the ball back, and let the remaining three players find the open man. Your rotation defenders will fail the first ten reps and improve with repetition. That practice is mandatory before blitz coverage works in a game.
ICE and Force — Dictating the Ball Handler's Direction
ICE coverage — also called "force" — is about pre-determining the ball handler's direction before the screen is even set. The on-ball defender positions on the ball handler's high side, forcing him baseline or toward the sideline. The big does not hedge or help; he simply covers the roll or the paint.
ICE is most effective against side ball screens because the sideline acts as a second defender. The ball handler is forced away from his preferred direction, the screen loses its effectiveness because the screener is setting it in the wrong spot relative to the new path, and the big stays connected to the paint without having to hedge and recover.
The vulnerability in ICE is the screener's pop. When the on-ball defender forces baseline and the big stays in the paint, there is space on the high side — exactly where the screener popped. A screener who can make a three-pointer on the pop will find clean looks in ICE coverage, because the on-ball defender is occupied forcing the baseline drive and the big is anchored low. Against a shooting big, ICE can become a three-point-generating scheme for the offense.
The most common ICE mistake is the on-ball defender not getting to the high side before the screen is set. If the screen is set first, the defender can't get to the correct position without fouling or giving ground. ICE requires anticipation — the on-ball defender reads the screener's path, communicates the call, and beats the screener to the high side spot before contact is made. Teach this as a pre-screen positioning discipline, not a reactive coverage.
Installing Your Pick-and-Roll Defense System
Effective pick-and-roll defense is not a single coverage. It's a system — a set of coverages with clear rules for when each applies, practiced against the specific counters the offense will use, and communicated before every screen is set.
Start with your base coverage. Most coaches at the high school and college level should build their base from drop or soft show — these are the most forgiving coverages for players still developing the lateral quickness and anticipation required for advanced schemes. Once your base is solid, add one situational coverage for specific personnel matchups: switch against non-shooting bigs, blitz against a poor ball handler under pressure.
Teach the offensive counters explicitly. Your defenders should understand that a hard hedge invites a split move, that a switch invites a post-up, that a blitz invites a four-on-three. When defenders know what they're preventing — not just what they're doing — they make better decisions in the moment. A big who knows the split move is coming off a hard hedge will position his body differently to cut off the gap.
Communication before the screen is the single most correctable habit in pick-and-roll defense. The screener's man must call out the screen early. The on-ball defender must hear the coverage call. Both players must know their assignment before the screen is set. Wall-to-wall communication eliminates the "I didn't know" mistakes that generate layups.
Film study of the opponent's ball-screen tendencies shapes coverage calls more than any scheme. Which side does their ball handler prefer? Does the screener roll or pop? Does the offense have a blitz counter? A one-hour pre-scout film session on the opponent's pick-and-roll tendencies gives your defenders a clear picture of what they'll see before the game starts. That picture is the most efficient defensive preparation you can do.
Finally, practice the recovery and the rotation, not just the initial coverage. Most pick-and-roll possessions are won or lost in the three seconds after the coverage call — the big recovering to the paint, the corner rotating to tag the roller, the weak-side wing closing out to the popper. Drill these rotations separately, name them, and hold players accountable to them in scrimmage. The coverage is only as good as the recovery that follows it.
- Call the coverage before the screen is set — screener's defender calls "screen" early, on-ball defender acknowledges the coverage call before the action fires. No communication = no scheme.
- Tag the roller in every coverage — the weak-side help defender takes one step toward the lane when the screen fires to prevent the easy dump-off pass to a rolling big, then recovers to his man on the pop.
- Fight over the screen in drop coverage — the on-ball defender must stay on the ball handler's hip going over the top. Going under the screen in drop coverage gives the ball handler a free pull-up at the spot the big just vacated.
- Know your switch counter — after any switch, the screener's first look is a post-up of the smaller defender. Your switched defender must stay connected and not allow an easy entry pass to the mismatch.
- Practice the blitz rotation before you use it in a game — blitz coverage requires four-man coordination on the back end. Run it against your own offense in practice until the corner skip and the short-roll closeout are automatic.
- In ICE coverage, beat the screen to the high side — on-ball defenders must read the screener's path and position on the high side before contact is made. ICE is a pre-screen skill, not a reactive one.
Want more basketball coaching strategies, drills, and tools?
See it drawn up
Related diagrams


Keep Building
Related breakdowns
Basketball Pick and Roll Fundamentals for Players
Basketball Pick and Roll Fundamentals for Players