There is no single best zone defense. There is a best zone for your roster against the team you play Friday. Each zone below leaves one area thin on purpose, and each has one position that decides whether it works. Find the zone whose thin spot your opponent cannot hurt, and whose key position you can fill.
If you are still choosing between zone and man-to-man at all, read Man-to-Man vs Zone Defense first. For every defense on one page, see Types of Defense in Basketball.
1. 2-3 Zone: Protect the Paint
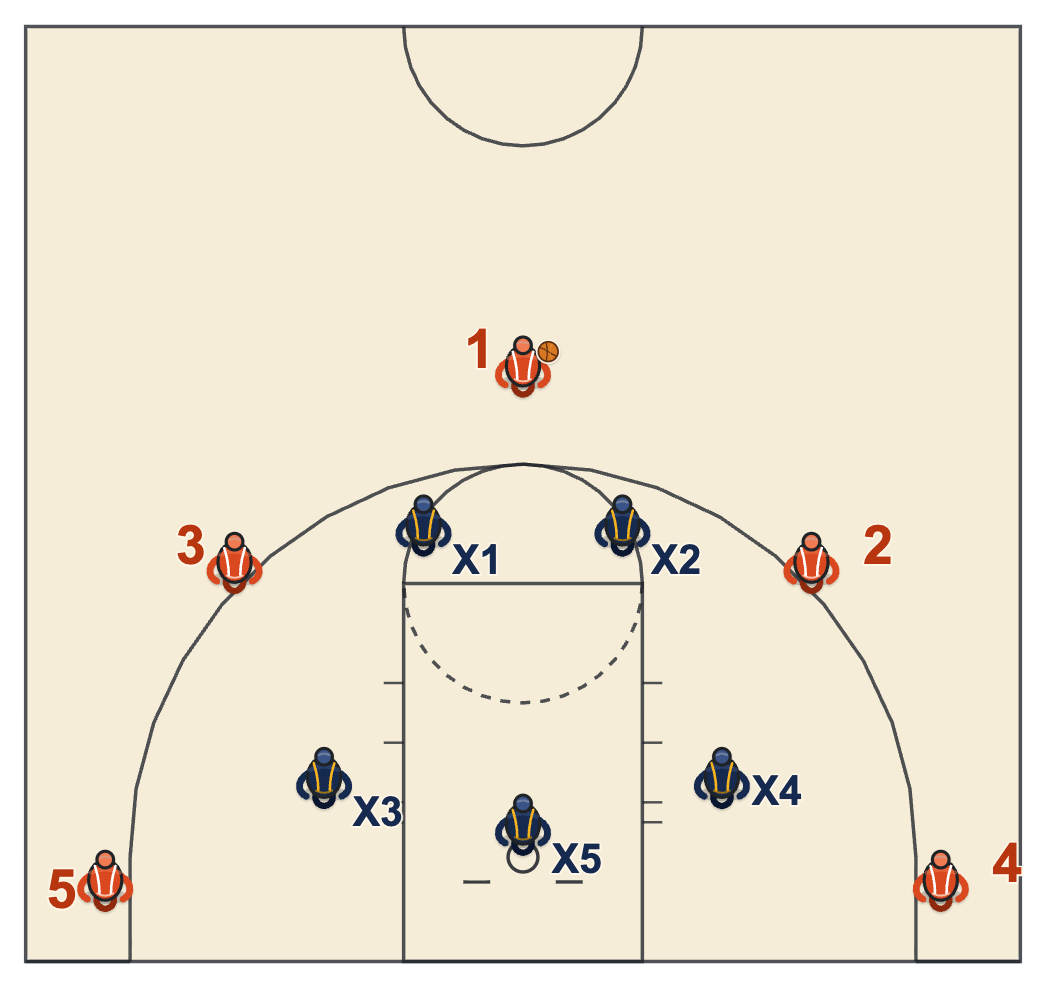
Takes away: the paint, the rim and a strong post player.
Thin spots: the high post, the short corner and the corners, plus the half second after a quick ball reversal.
Key position: the center. He guards the post, contests every shot at the rim, steps to the short corner and talks the whole time.
Pick it when: you have size and the opponent scores inside.
The two top defenders start a step inside the arc and close together, so the pass to the elbow is hard. Coaches split on what happens when the ball gets there anyway. One version collapses on the high post. The tandem version lets the center guard it one on one while the other four sprint to the shooters, and starts the wings wide at the free-throw line extended so corner threes are contested. Both are drawn side by side on the types of defense hub. Full breakdown: 2-3 Zone Defense.
2. 3-2 Zone: Own the Top and the High Post
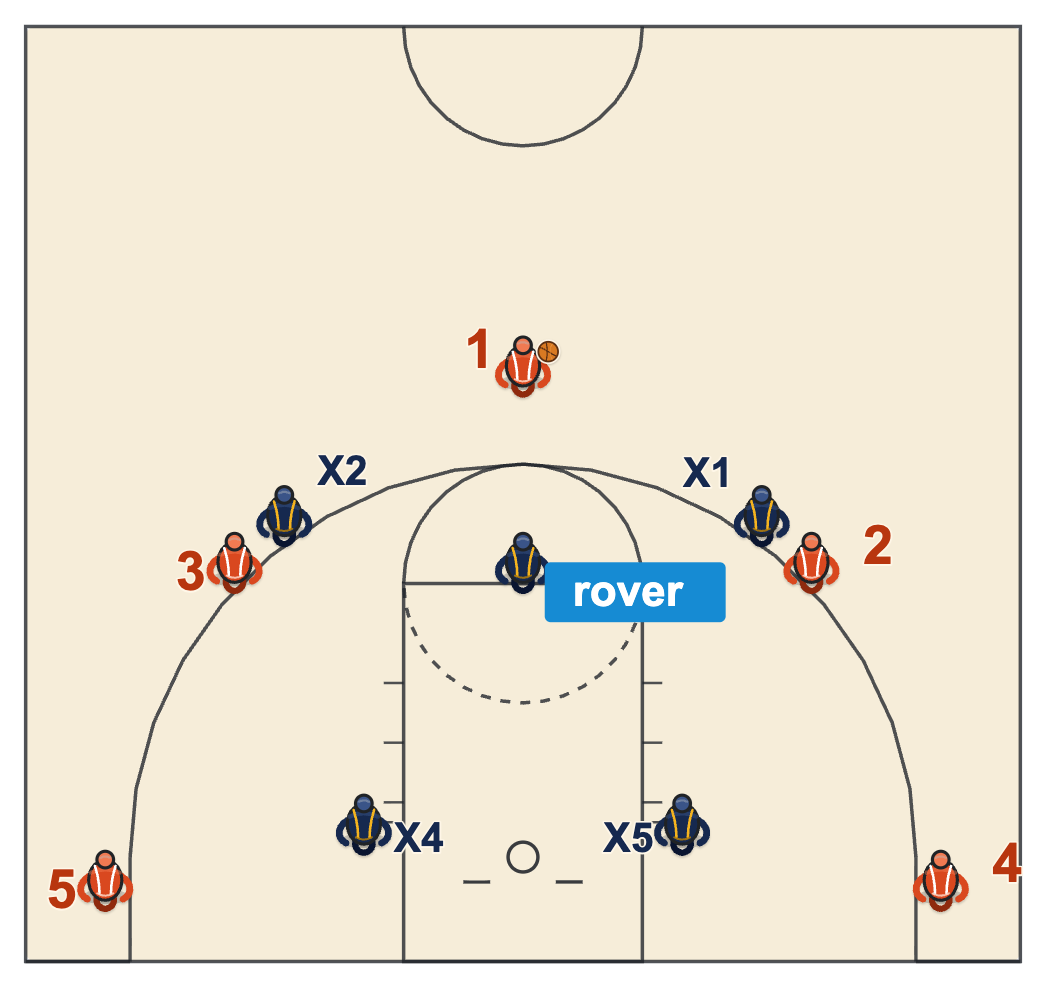
Takes away: the high post, the wing catch and the ball reversal.
Thin spots: both corners at once, and dribble penetration, because only two defenders start near the rim.
Key position: the back two. They cover both blocks and both corners and must be bigger and quicker than the back line of a 2-3.
Pick it when: the opponent cannot shoot from the top and runs its offense through the high post.
The 3-2 wins from the front. If the top three do not pressure, it breaks down faster than any other zone. It also pairs with the 1-2-2 press, since the same five players can drop into it without new positions. Full breakdown: 3-2 Zone Defense. Head to head with the 2-3: 2-3 Zone vs 3-2 Zone.
3. 1-3-1 Zone: Trap the Corners
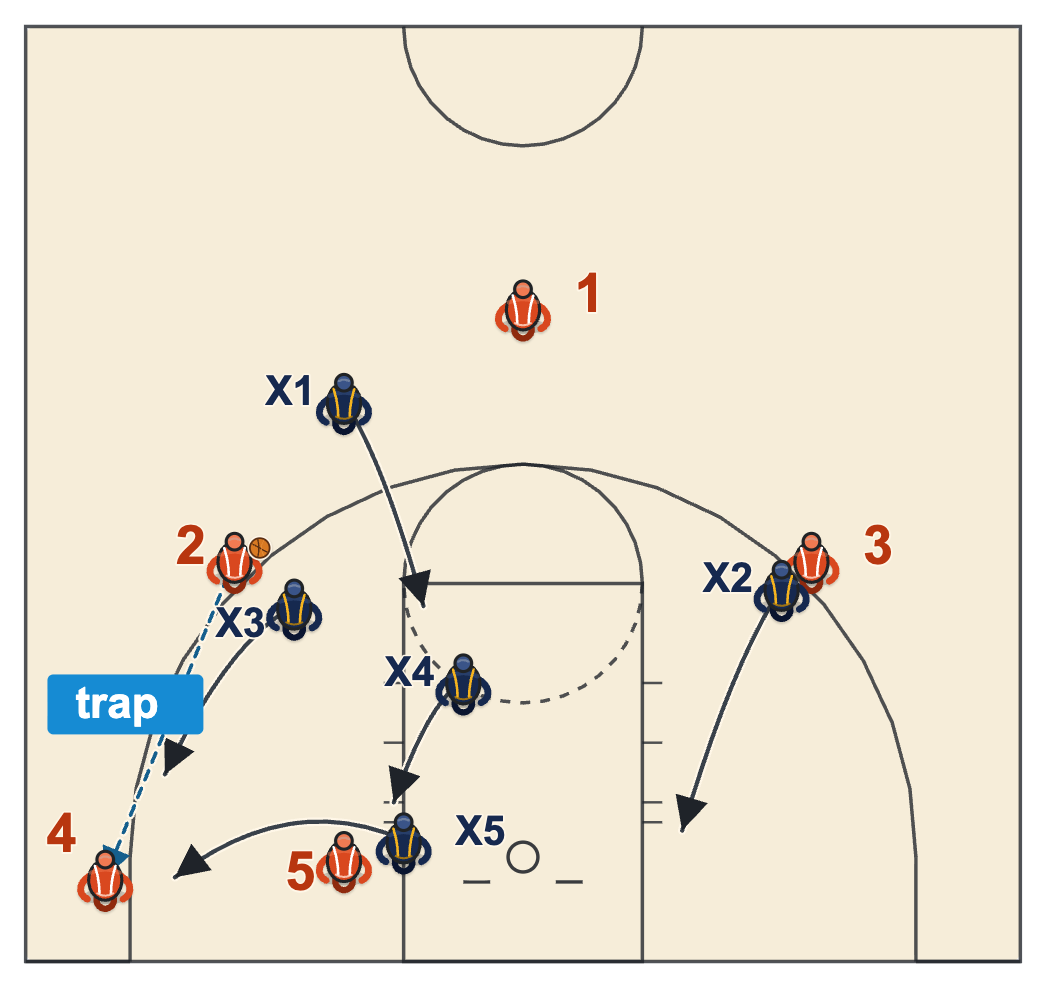
Takes away: the reversal pass and the corner, where it traps.
Thin spots: the pass from the corner to the elbow after a trap, the far corner when the baseline runner cheats, and an overload with two players on one side.
Key position: the baseline runner, who covers corner to corner. Coaches often pick a small, quick, loud guard for it.
Pick it when: you have length at the top and wings, and you want steals more than safety.
The 1-3-1 is the highest-variance zone here. It creates more steals than a 2-3 and gives up more open layups when a trap is beaten. Coaches who cannot live with those layups should pick a lower-risk shape. Depth is adjustable: drop back against weak ball handlers and bait lobs, or extend to deny the first catch against poor shooters with penetrating guards. Full breakdown: 1-3-1 Zone Defense.
Get the next side-by-side in your inbox
One email when a new comparison or diagram set goes up. Free.
4. 1-2-2 Zone: Pressure the Perimeter
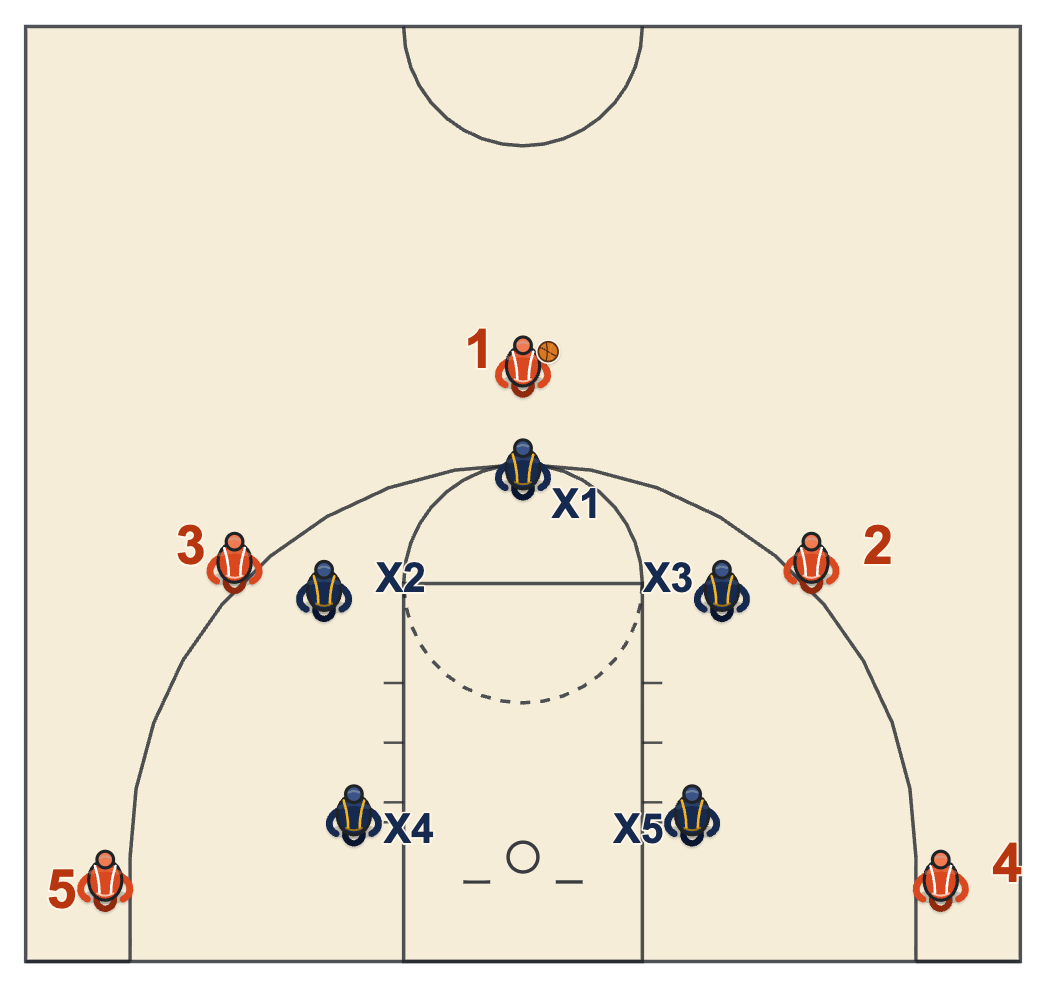
Takes away: perimeter rhythm and the high post, because the wings pinch in.
Thin spots: rebounding, since only two start near the rim.
Key position: the top defender, who pressures the ball and turns it to one side.
Pick it when: the opponent is built on guards and three-point shooters with little inside game.
The 1-2-2 is also the starting shape of the classic matchup zone, so a team that learns it can grow into the matchup later. Full breakdown: 1-2-2 Zone Defense.
5. 2-1-2 Zone: Plug the Elbow
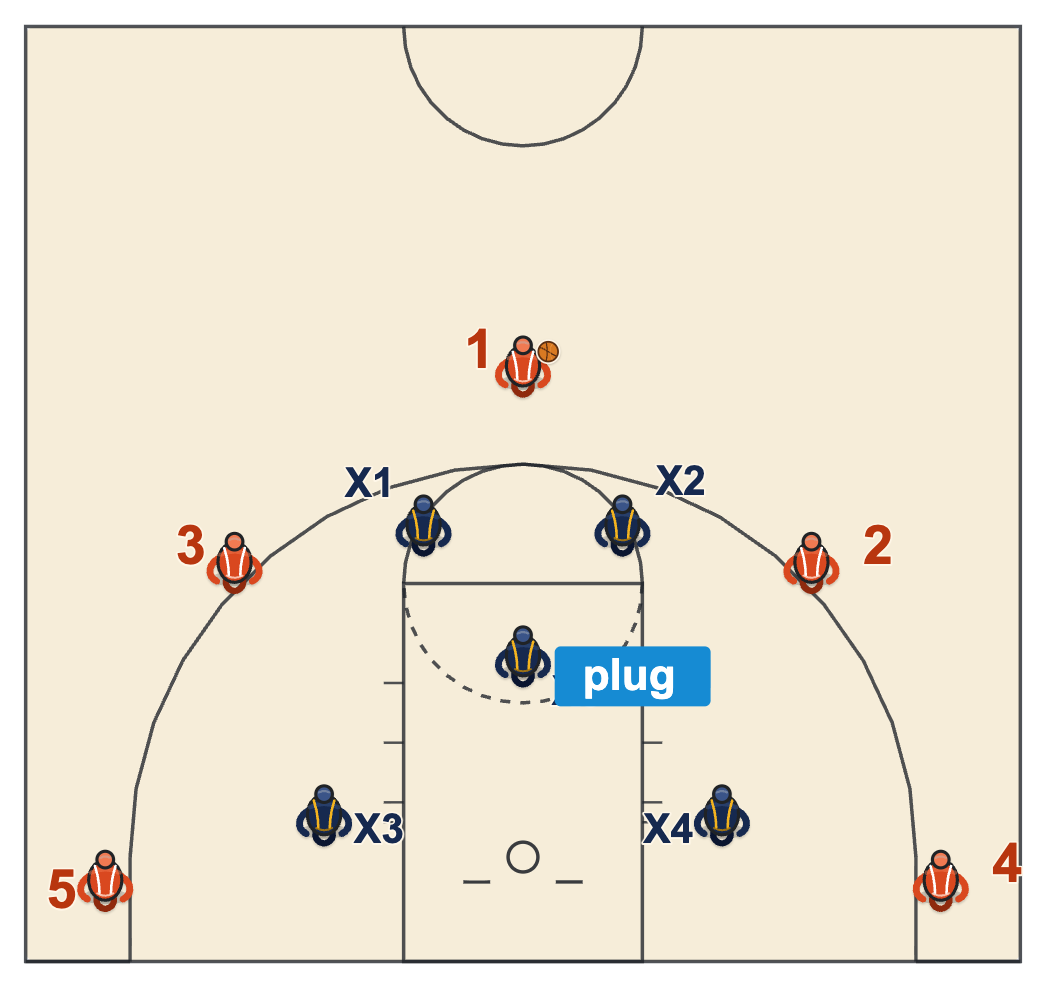
Takes away: the elbow and the high post from the first pass.
Thin spots: the corners, which widen because the middle is loaded. A middle defender pulled up also makes the high-low pass to the rim easier.
Key position: the plug, who has to guard a catch at the elbow and still get back.
Pick it when: the opponent runs everything through a player at the elbow and has no reliable corner shooter.
Think of it as a 2-3 adjustment more than a separate system. Full breakdown: 2-1-2 Zone Defense.
6. Matchup Zone: Zone Shape, Man Rules
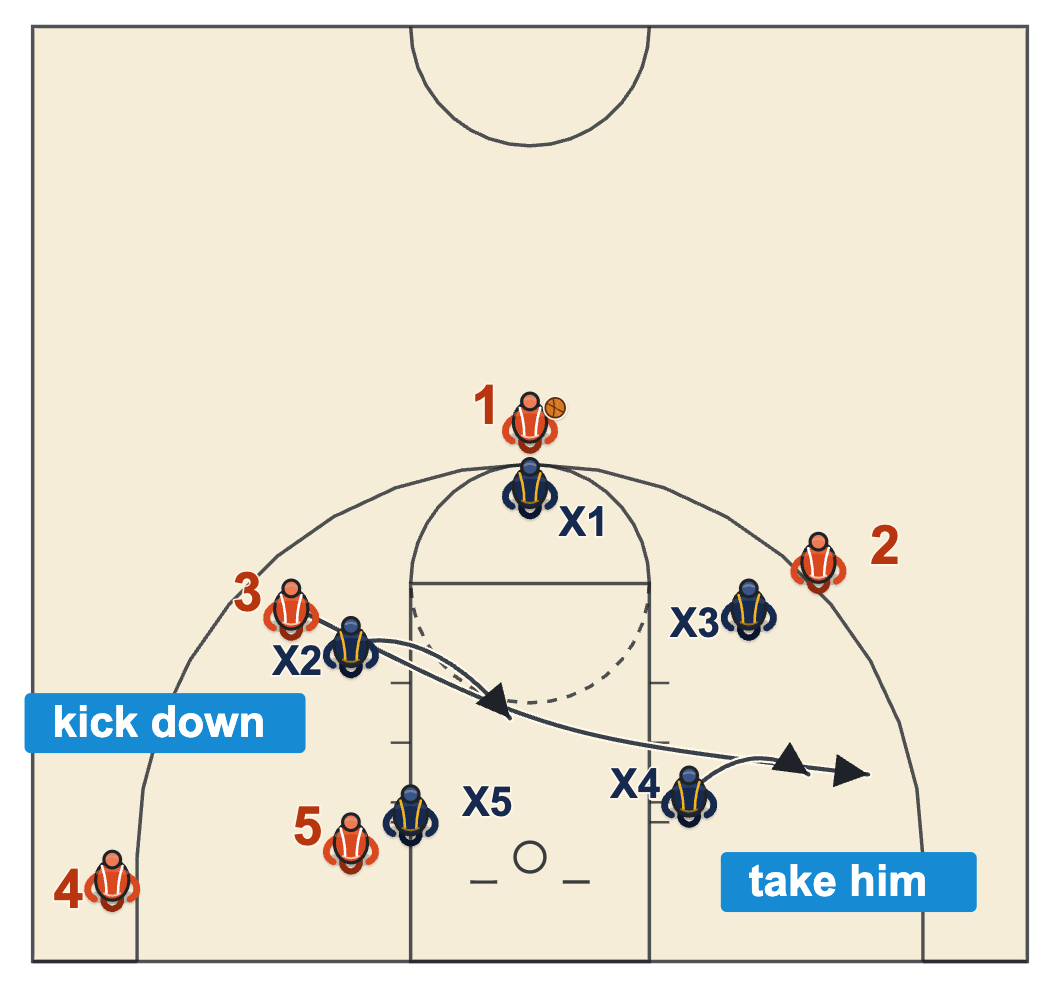
Takes away: scouting. The offense sees a zone and runs zone plays into man pressure.
Thin spots: the seams whenever a handoff is silent, and double screens or overloads the team has not seen.
Key position: everyone. The point defender sets the starting spot for the other four, and every handoff needs a call.
Pick it when: the group is experienced and vocal. It is too talk-heavy for most young teams.
Rules that keep it together: call every cutter, never let two defenders cross, keep one foot in the paint off the ball, and have a reset word that sends everyone back to the base shape when the coverage gets confused. Full breakdown: How to Coach the Match-Up Zone.
Quick Picker
| If the opponent... | Try | Because |
|---|---|---|
| scores through a big inside | 2-3 | Three defenders start near the rim |
| feeds the high post and cannot shoot from the top | 3-2 | The rover already sits on the high post |
| has shaky ball handlers | 1-3-1 | Corner traps and denied reversals force lobs |
| is all guards and shooters | 1-2-2 | Pressure on the perimeter where they live |
| runs everything through the elbow | 2-1-2 | The plug takes that catch away |
| has studied your zone all week | Matchup | It looks like a zone and plays like man |
Rules Every Zone Shares
- Move while the pass is in the air. Be in the new spot before the catch.
- Hands up and in the passing lanes. Force lobs and skips you can react to.
- Think tip, not steal. A deflection means the zone worked.
- On a skip pass, the top defender takes it if it goes high, the bottom defender if it goes low.
- Help-side defenders open up and face the corner so they see the skip and the screen.
- Keep the dribble out of the paint. Penetration opens every passing lane at once.
- Find a body on the shot. Zones give up offensive rebounds when nobody owns a box-out.
A last caution many youth guides repeat: a tight 2-3 wins games early and slows the development of on-ball and help defense. If your team is young, see Best Defense for Youth Basketball Teams before you commit to a zone as your identity. For the other side of the ball, see How to Beat a 2-3 Zone.
Want every frame, printable?
OBP Pro members get the full diagram files for every defense on this page, ready for a practice binder or a scouting report. $9 a month. Or draw your own version free in the play drawer.
See what OBP Pro includesMore Side-by-Side Pages
- Types of Defense in Basketball
- 2-3 Zone vs 3-2 Zone
- Man-to-Man vs Zone Defense
- Pack Line vs Pressure Man-to-Man
- Best Full-Court Press: 6 Presses Compared
Back to Types of Defense and every Defense page.
Keep Building
Related breakdowns
Best Full-Court Press: 6 Presses Compared
The 1-2-1-1, 2-2-1, 1-2-2, 1-3-1, run and jump and full-court man, sorted by where they pick up, where they trap and how much they risk.
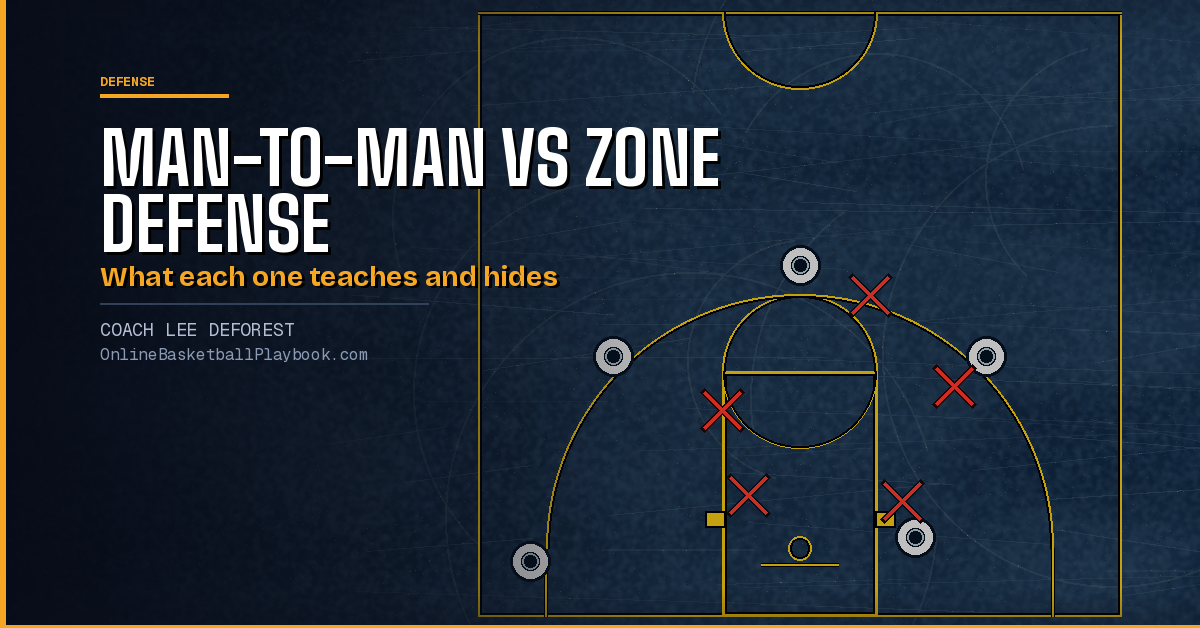
Man-to-Man vs Zone Defense
What each one teaches, what each one hides, when to switch mid-game, and the hybrid that sits between them.
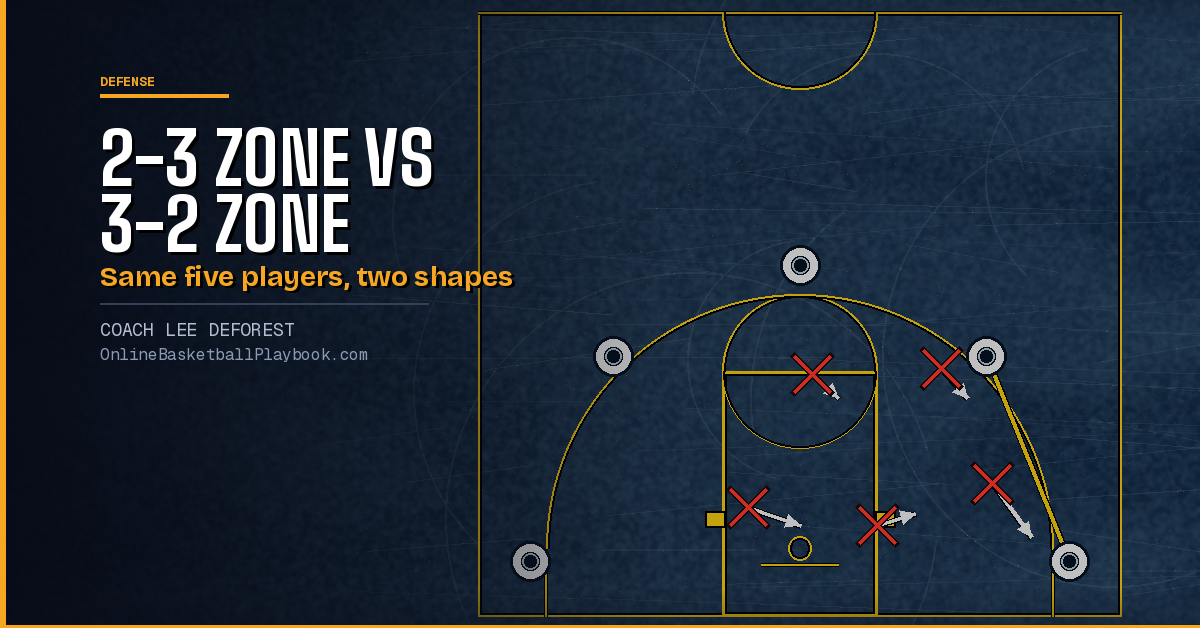
2-3 Zone vs 3-2 Zone
The same five players in two shapes. One guards the rim, the other guards the high post, and each leaves a different spot open.