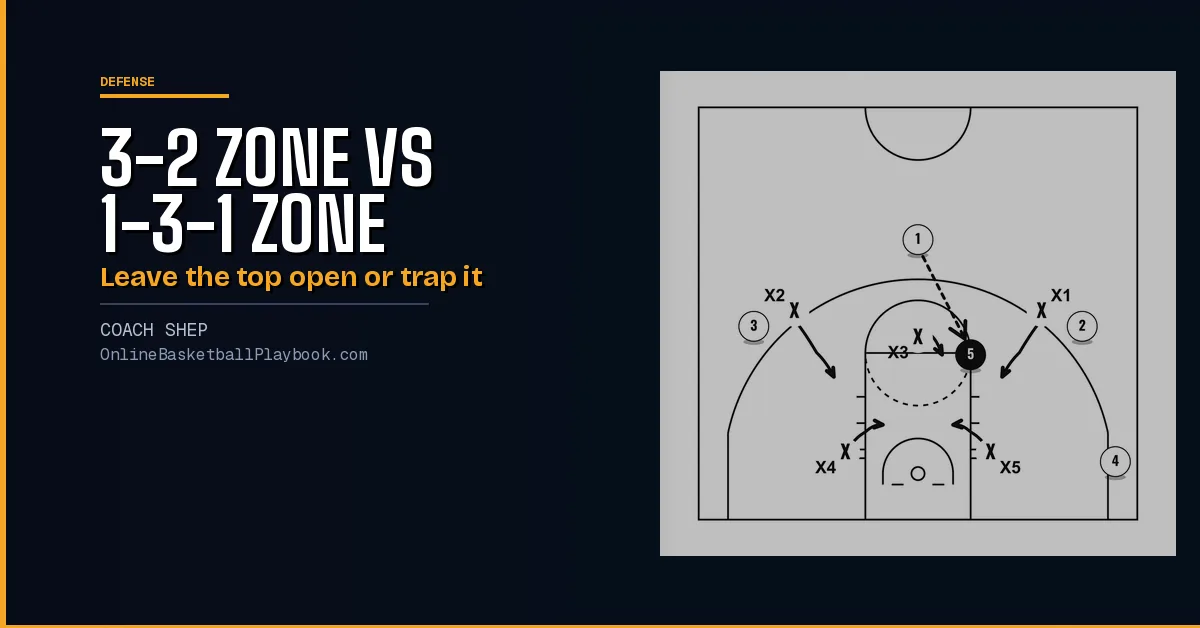
The 3-2 zone vs 1-3-1 zone choice looks small on a whiteboard. Both put three defenders across the free-throw line area. The difference is the top of the key and the baseline. The 3-2 leaves the ball handler at the top of the key alone, denies the wing passes and keeps two defenders back for the blocks and the corners. The 1-3-1 puts a defender on the ball at the top, overplays the passing lanes and sends one runner along the baseline to cover both corners. Below, both are drawn at the same ball spots.
3-2 Zone vs 1-3-1 Zone at a Glance
| 3-2 zone | 1-3-1 zone | |
|---|---|---|
| Shape | Three across the free-throw line, two back on the blocks | One on top, three across the free-throw line area, one on the baseline |
| Ball at the top of the key | Left alone, the wings deny the wing pass, the rover sits on the high post | Picked up, pushed to one side, kept from swinging back |
| Strong | Across the free-throw line, high-post denial | The free-throw line area, the top of the key, passing lanes, traps |
| Thin | Top of the key, corners, dribble penetration | Corners, low post, the corner-to-elbow skip |
| Corner coverage | Two back defenders, one on each side | One baseline runner for both corners |
| Main trap | The corner, with a back defender and a wing | The corner, plus top and wing traps in some versions |
| Offense usually answers with | A shooter at the top of the key, overloads, the skip to the corner | A two-guard front, baseline screens, the skip to the far corner |
The Base Shapes


In the 3-2 the middle defender of the front three is the rover. He stands on the free-throw line with his arms wide, and both wings play full denial. When the ball sits at the top of the key, the offense must go through the elbows or skip the ball to a corner. Nobody guards the ball handler there on purpose.
In the 1-3-1 the top defender picks up the ball, steers it to one side and takes away any dribble back to the other side. The wings move up and down with the ball, the top and the baseline runner move side to side.
Ball on the Wing


On the wing the two zones look alike. In both, the ball-side wing defender takes the ball and the far wing sinks. The 3-2's far wing drops into the key to stop flashes, and its ball-side back defender fronts the low post because he also has the corner. The 1-3-1's far wing sinks to cut off the diagonal pass into the post or the elbow.
The difference is above the ball. The 3-2 rover keeps guarding the high post. The 1-3-1 top defender either drops toward the ball-side elbow or sits in the passing lane between the guards so the ball cannot swing back. The 1-3-1 wants the ball stuck on one side. The 3-2 wants the high post shut.
Ball in the Corner


Both zones call the corner their weakness, and both call it their best trap spot.
The 3-2 has a back defender on each side, so the ball-side one steps out and the far one slides over to the ball-side block and plays behind. The far wing drops toward the basket and the rover steps toward the ball. When the 3-2 traps, the ball-side back defender and the ball-side wing double with high hands and no reaching, and the rotations behind it are simple.
The 1-3-1 has one runner for both corners. In the common version he traps with the ball-side wing while the top defender drops to the elbow and the middle fronts the block. Other versions trap with the wing and the middle and leave the runner near the rim. The pass from the corner to the elbow is the one the 1-3-1 fears most, so somebody has to own the elbow every time.
Get the next coaching guide in your inbox
One email when a new guide or diagram set goes up. Free.
Ball at the High Post


Both zones start with a defender on the high post, so both try to keep this catch from happening. When it happens anyway, they answer in different ways.
- 3-2: the rover takes the ball, both back defenders pinch, and both wings drop into the space between the high post and the corners so they can close out quickly. The goal is to force the pass back out.
- 1-3-1: the middle defender denies above the free-throw line and fronts below it. If the ball still gets to the elbow, one version doubles with the top defender and the middle defender and allows the pass back out.
The Drive and the Skip
This is where the two shapes part ways most.
Penetration. With only two low defenders, the drive is the 3-2's real weakness. From the top of the key, the ball-side back defender steps up and the ball-side wing drops to take the corner three. From the wing, the back defender meets the drive just short of the paint, ready to race back to the corner. A drive along the baseline is not allowed at all: the back defender closes out forcing the ball to the middle, and if one gets through, the two back defenders trap it and the rover drops to the middle. The 1-3-1 answers the drive with the middle defender, who steps up to put three defenders around the ball as the baseline runner and the far wing pinch the paint. Its gaps look open, but a drive into them meets the middle defender already standing there.
The skip. In the 3-2 the far wing closes out first, from the high side, and steers the shooter toward the back defender, who bumps him back. Everyone changes sides while the ball is in the air. In the 1-3-1 the far wing always closes out too. A skip to the far corner sends the baseline runner sprinting to bump or trap, and a skip to the wing gets a curved closeout that takes away the corner pass first. Offenses screen the low defenders on these skips. The 3-2's back defenders fight for top position and keep a clear path to the corner. The 1-3-1's runner cannot afford even a half-second delay, because one held step frees a corner shooter.
See both attacks from the offense's side on How to Beat a 3-2 Zone and How to Beat a 1-3-1 Zone Defense.
Personnel
3-2: three roles. The rover is usually a long, athletic forward who guards the high post, steals lobs thrown out of traps and goes hard to the boards. The wings are usually guards who deny and trap. The two back defenders are usually the two tallest, and they challenge shots in the lane, guard the corners and rebound. One version swaps a tall, athletic wing into the rover spot so the taller player handles the high post.
1-3-1: coaches split on every spot.
- Top: a tall, long guard who makes the reversal hard, or the quickest, most athletic player, or the point guard directing traffic.
- Wings: the best athletes, or corner trappers who also guard the weak-side block, with the strongest rebounder on the left wing in one version.
- Middle: a post defender who fronts high and low.
- Baseline: a small, quick, vocal guard, the most athletic player, or a big who stays near the rim while the wings take the corners.
Whichever zone you pick, every player has to know his one job.
Where Coaches Split
- Who the 3-2 is for. Cautious version: only against a team that cannot shoot from the top of the key, never against one that can. Extended version: a 3-2 pushed out to pressure a team that shoots well from outside.
- 1-3-1 depth. Loose: pack inside about 20 feet and play it conservative against weak ball handlers and poor shooters. Tight: extend and deny against quick guards who cannot shoot.
- 1-3-1 rebounding. One side says it rebounds fine when roles are set. The other says one true low defender makes the glass its weak spot. The 3-2 has a simpler answer: every perimeter shot puts three defenders in a rebounding triangle.
- Shading from one to the other. One 3-2 install shifts to a 1-3-1 or a 1-2-2 when the other team's point guard can shoot from deep, because the 3-2 gives that shot up by design.
Pick It When
- The opponent runs its offense through the high post and its point guard cannot shoot from the top of the key: 3-2.
- The opposing point guard can really shoot: 1-3-1, which puts a defender on him.
- You want to trap from more than one spot: 1-3-1.
- You want a set rebounding triangle on every perimeter shot: 3-2.
- You already run a 1-2-2 press: the 3-2 uses the same spots, so the press drops straight into it.
- The opponent drives the gaps well: be careful with the 3-2.
- The opponent has shooters in both corners: be careful with both, and drill the skip closeout.
- The opponent's guards handle the ball poorly: 1-3-1, played loose.
The full installs are on 3-2 Zone Defense and 1-3-1 Zone Defense. For the other matchups, see 2-3 Zone vs 3-2 Zone, 1-3-1 vs 2-3 Zone and 1-2-2 vs 2-3 Zone, and for every defense in one place, Types of Defense in Basketball and Best Zone Defense for Your Team.
Questions Coaches Ask
Is a 3-2 zone the same as a 1-3-1?
No. Both put three defenders across the free-throw line area, but the 3-2 keeps two defenders back and leaves the ball handler at the top of the key alone. The 1-3-1 puts a defender on that ball handler and keeps only one defender on the baseline.
Which zone is better against a point guard who can shoot?
The 1-3-1, because its top defender guards him. The 3-2 gives that shot up on purpose, and one 3-2 install switches to a 1-3-1 or a 1-2-2 when the point guard is a real threat.
What is the weakness of both zones?
The corners. The 3-2 has two back defenders to cover them and the 1-3-1 has one, so a skip to the far corner tests both. The 3-2 also struggles with the drive, and the 1-3-1 with the pass from the corner to the elbow.
Is a 3-2 zone the same as a 1-2-2?
No. In the 1-2-2 the top defender guards the ball and the wings protect the high post. In the 3-2 the middle defender sits on the free-throw line and the wings deny. The 1-2-2 zone defense guide has the full difference.
Want the printable playbook packs?
Playbook packs: zone attack, press break, press defense, out of bounds, quick hitters, practice plans and the youth turnover cure, each a printable PDF. Or draw your own version free in PlayDraw.
See the playbook packsRelated Guides
Back to Types of Defense and every Defense page.
Keep Building
Related breakdowns
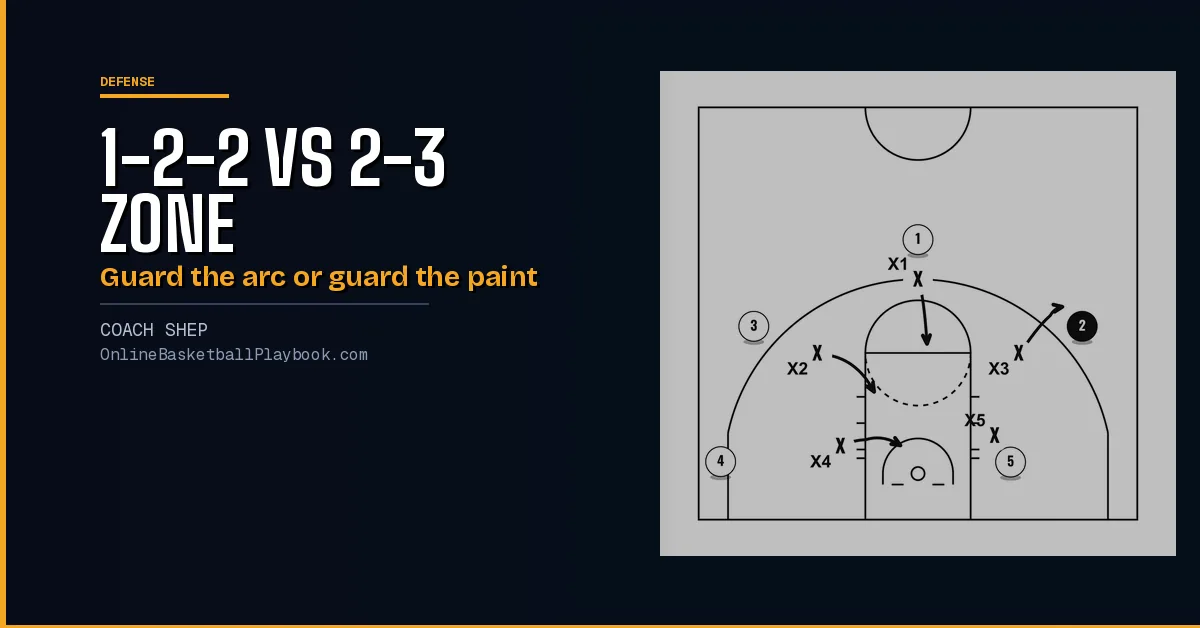
1-2-2 vs 2-3 Zone Defense: Guard the Arc or the Paint
The 1-2-2 gives every defender a piece of the arc to contest threes. The 2-3 keeps three near the rim. Both drawn at the same ball spots.
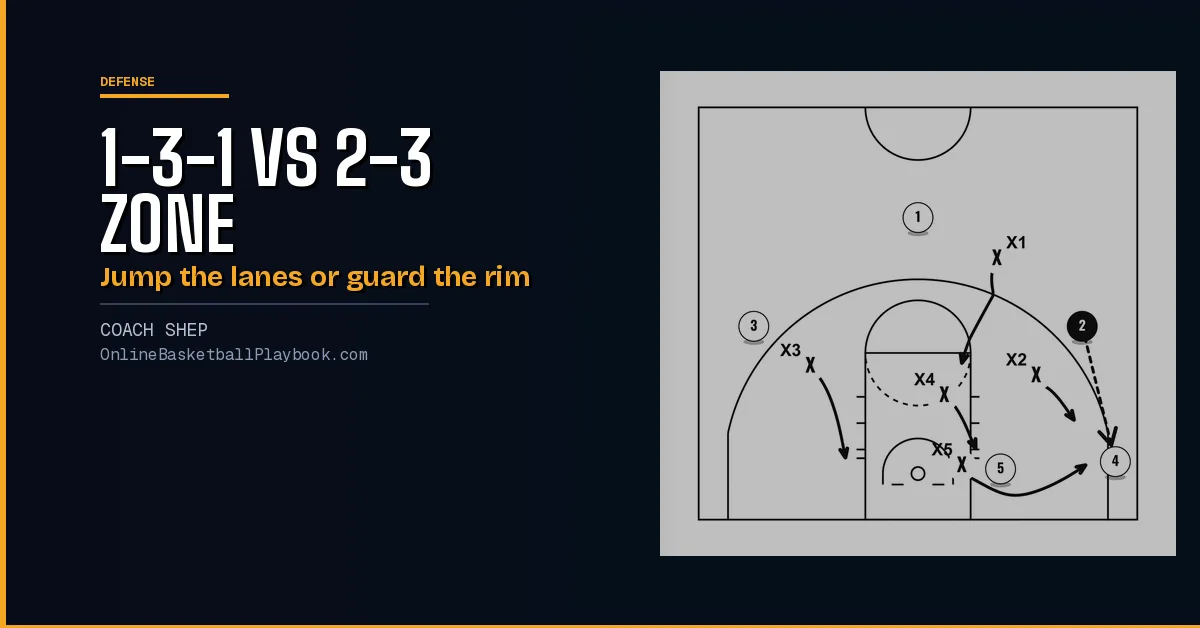
1-3-1 vs 2-3 Zone Defense: Side by Side
The 1-3-1 lives in the passing lanes and traps the corners. The 2-3 sits near the rim. Both drawn at the same ball spots, with the rosters each one fits.
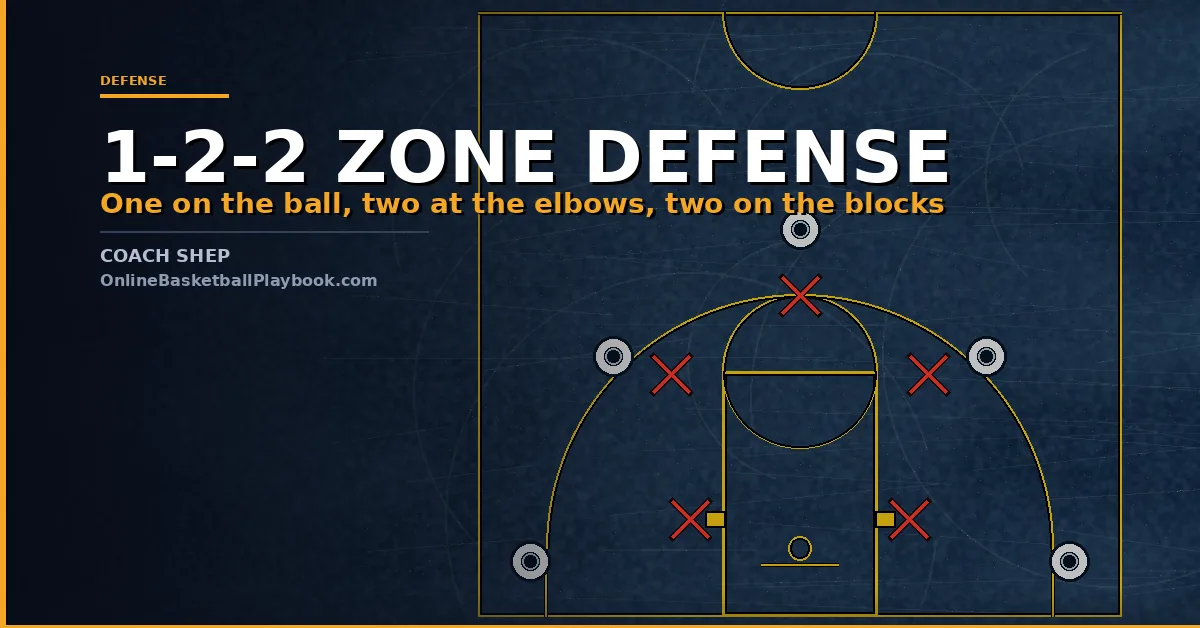
1-2-2 Zone Defense: Rotations, Weak Spots and Drills
1-2-2 zone defense: the five roles, rotations for every ball spot, the corner trap, the high post problem, variations coaches run and the drills.